In this guide, we will show you various methods to fix the TWRP encryption issue on your Android device. If you are planning to step into custom development, then a custom recovery could prove to be the best tool that you could have at your disposal. And the reason for the same is hardly a secret either.
Right from the ability to take a backup of all the data on your device with the help of Nandroid backup to deleting data from the partitions before flashing custom ROM, there’s a lot to look forward to. However, its biggest asset is the ability to easily flash ZIP and IMG files in just a few taps. Just head over to the Install section, navigate to the desired file, select it, and do a right swipe to flash it.
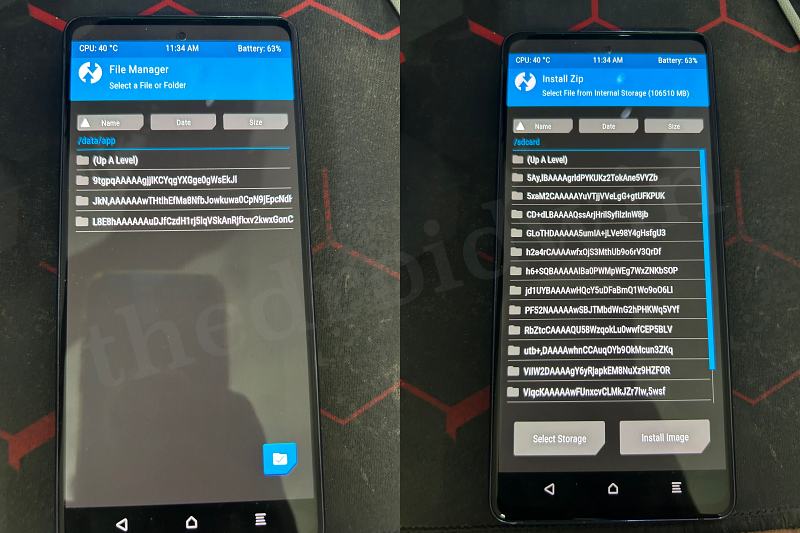
However, in some instances, this navigation could prove to be a tough nut to crack. This is because all the files and folders on your device might be renamed with random alphabets and you wouldn’t be able to identify any of the files that you want to flash. So why is this happening?
Well, the root cause of this issue is the fact that the data partition on your device is encrypted and TWRP is unable to decrypt it.Fortunately, though, there exist quite a few methods through which you could easily rectify this issue [and a method to bypass it as well]. And in this guide, we will make you aware of all those tweaks. So without further ado, let’s check them out.
How to Fix TWRP Encryption Issues on Android
It is recommended that you try out each of the below-listed workarounds and then see which one spells out success. Moreover, please take a backup of all the data on your device, just to be on the safer side. TheDroidwin will not be held responsible if something happens to your device or data after performing the below steps:
Prerequisite: Boot to TWRP Recovery
Throughout the course of this guide, we will advise you numerous times to boot your device to the TWRP Recovery. So you may refer to the steps given here and get the job done.
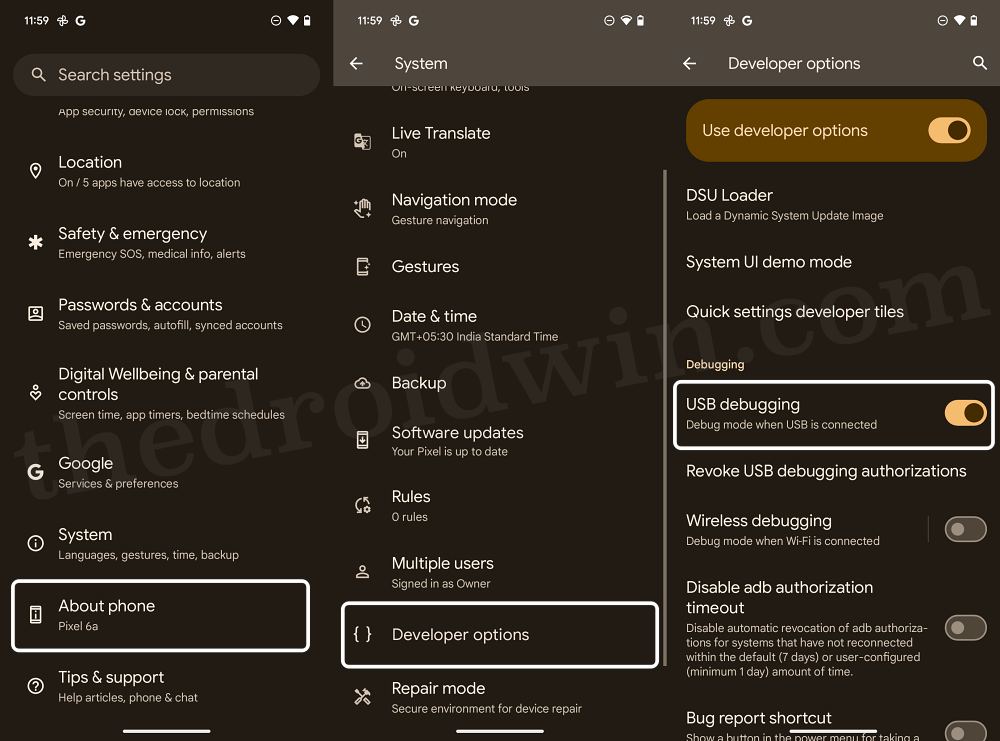
- First off, head over to Settings > About Phone > Tap on Build Number 7 times.
- This will enable Developer Options, which could be accessed via Settings > System.
- From there, enable USB Debugging and connect your device to PC via USB cable.
- Now download and extract the Android SDK Platform Tools on your PC.
- Then type in cmd in its address bar and hit Enter. This will launch Command Prompt.
- Now, type in the below command to boot your device to TWRP Recovery:
adb reboot recovery
FIX 1: Remove Screen Lock
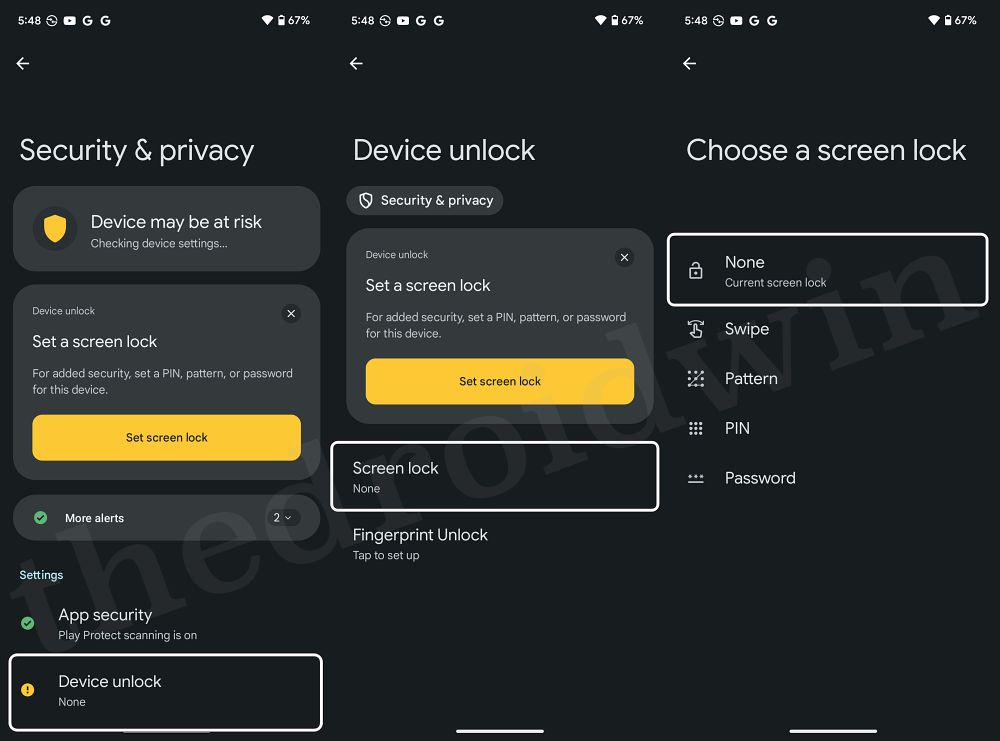
Your first course of action should be to remove all the screen locks from your device, including PIN, Password, Pattern, and Face Unlock. So carry out this task via the below-listed steps and check out the results
- Go to Settings > Security and Privacy > Device Unlock.
- Then go to Screen Lock and choose None from the list.
- Once done, boot your device to the TWRP and go to Install.
- Check if the TWRP Encryption issue has been fixed or not.
FIX 2: Mount Data Partition
Your next course of action should be to mount the data partition. If it’s already mounted, then unmount and remount it [as shown below]. Here’s how all of this could be carried out:
- Boot your device to TWRP Recovery via the below command:
adb reboot recovery
- Then go to Mount and checkmark the Data partition.
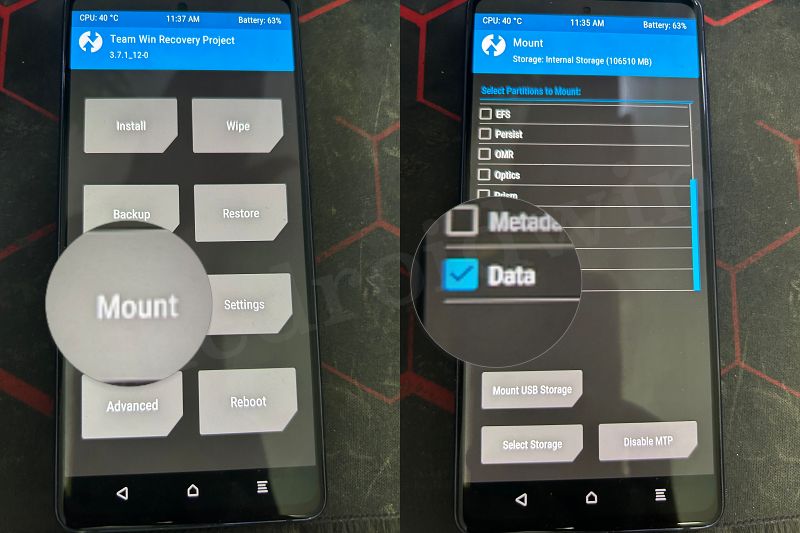
- If it is already checked, then uncheck and recheck it.
- Now go to Reboot and select Recovery. The device will reboot to TWRP.
- Check if the TWRP Encryption issue has been fixed or not.
FIX 3: Bypass Encryption
Before opting for the nuclear approach, you could also consider bypassing this issue instead of rectifying it under certain circumstances. For instance, I’m currently using Samsung Galaxy S20 FE and the custom. recovery wouldn’t be able to decrypt the storage till I’m on the stock firmware. The only way through which the encryption issue would be fixed is to move over to a custom ROM. However, as of now, I don’t wish to make this switch from the stock to custom OS.
And in my case, even if I opt for the last-ditch fix [given below], I wouldn’t be able to achieve success, since I’ll still be on the stock firmware. So what could be done in such instances? Well, in these cases, you could do an ADB push of the file and then flash it. Even if the data is currently encrypted, it will have no impact whatsoever on the file being pushed to your device. Moreover, TWRP will be able to easily read the file and you ould then flash it without any issues. So let’s give this tweak a try and check out the result:
- First off, boot your device to TWRP Recovery via the below command:
adb reboot recovery
- Now download and extract Android SDK Platform Tools on your PC.
- Then transfer the desired ZIP file to the platform-tools folder as well.
- Now type in cmd in the platform-tools folder address bar and hit Enter.
- This will launch Command Prompt. So type in the below command now:
adb push filename.zip /tmp
- From TWRP, go to Install > tmp directory and the file will be present there.
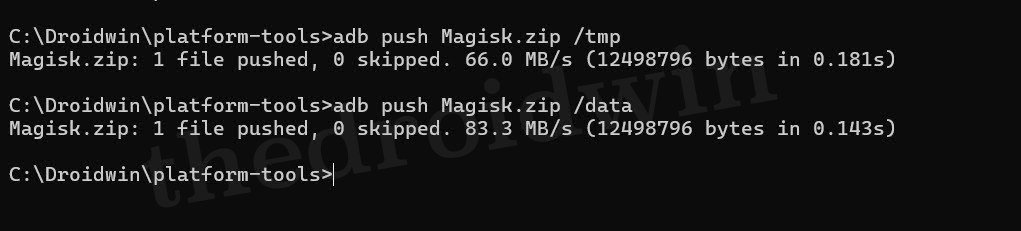
- If you cannot transfer to tmp, then try transferring it to the data directory:
adb push filename.zip /data
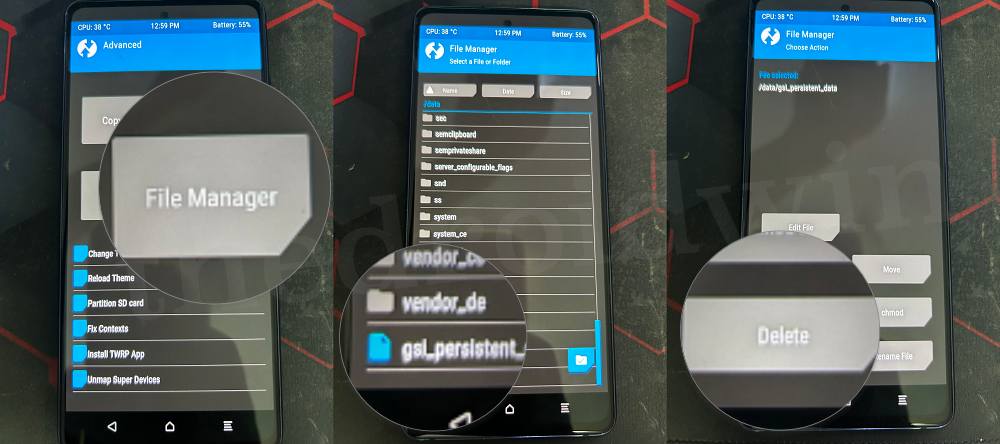
- Now select the file and flash it. Once done, go to Advanced > File Manager.
- Then choose that file and hit Delete [if it is no longer needed]. That’s it.
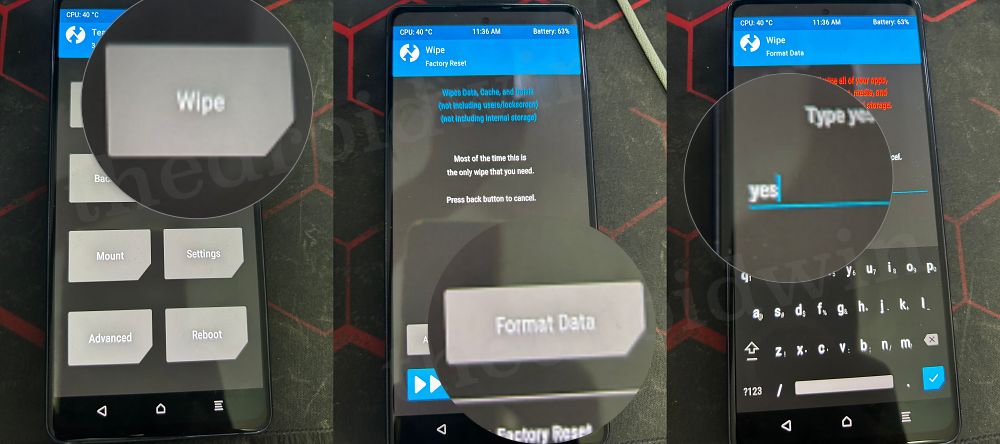
FIX 4: Factory Reset
If none of the aforementioned methods spelled out success, then your last course of action should be to do a factory reset which should definitely fix the issue [unless you are stuck in a fiasco similar to mine, as discussed in the above fix]. However, this process will also wipe off all the data from your device. So make sure to take a backup beforehand and only then proceed with the below steps:
- Boot your device to TWRP via the below command
adb reboot recovery
- Then go to Wipe > Format Data > and type in YES.
- Hit the checkmark and wait for the wipe to complete.
- Once that is done, go to Reboot and select Recovery.
- The data partition should now be decrypted on your device.
That’s it. These were the various methods to fix the TWRP Encryption issues on your Android device. If you have any queries concerning the aforementioned steps, do let us know in the comments. We will get back to you with a solution as soon as possible.