This guide will show you the steps to unlock the bootloader on your Android device. The open-source OS from the Silicon Valley giant beholds a slew of nifty features up its sleeves. However, there’s more to that than what meets the eye. You could further expand the capabilities of your device by taking the road less traveled and unearthing tons of hidden functionalities that have been preserved under the hood.
But before you embark on this journey, there’s an important prerequisite that you need to check off the list- the bootloader on your Android device needs to be unlocked. And in this guide, we will show you how to do just that. But before that, let’s have a sneak peek at the caveats and risks involved in carrying out this task as it will then help you in molding your decision accordingly.
Benefits and Risks of Unlocked Bootloader

Having an unlocked bootloader opens the floodgates to a plethora of customizations. For starters, you’ll be able to welcome abode the preferred custom ROM of your choice, install a custom recovery, flash a custom kernel, and even gain administrative access by rooting your device via Magisk. The latter, in turn, will allow you to flash numerous mods, tweaks, and rooted binaries which will end up adding more features to your device. However, this is just one side of the story.
Carrying out these tweaks brings in a few uninvited guests as well. First and foremost, the process will wipe off all the data on your device and might make the warranty null and void as well. On some phones like Samsung, Knox will be triggered which will prevent you from using banking and payment apps [not to mention the entire Play Integrity fiasco if you root your device]. So if that’s well and good, then let’s get started with the steps to get this job done.
How to Unlock Bootloader on any Android Device
Before starting, please take a backup of all the data on your device. TheDroidwin.com will not be held responsible in case something happens to your device and data after carrying out the below steps.
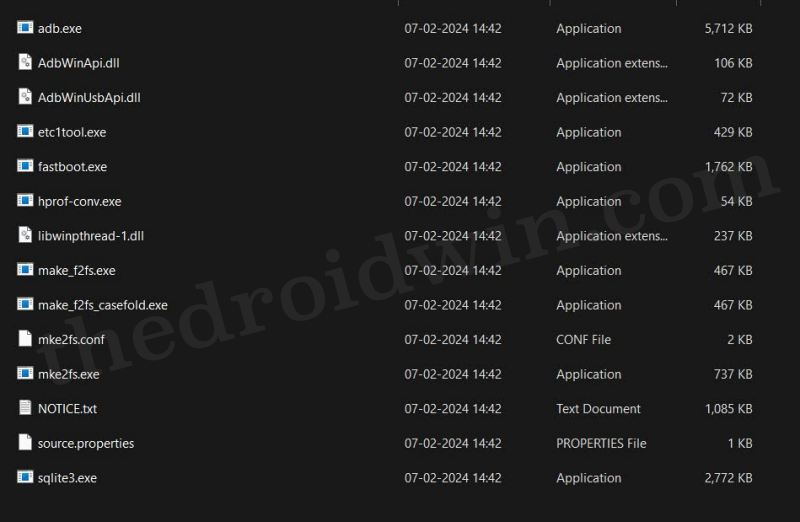
STEP 1: Download Android SDK Platform Tools
First off, download and extract Android SDK Platform Tools on your PC. While there exist quite a few ADB drivers, but this is the official one given by Google and is the only one that you should opt for. So download and extract them onto your PC. Likewise, also make sure to add it to the System Environmental Variable’s path.
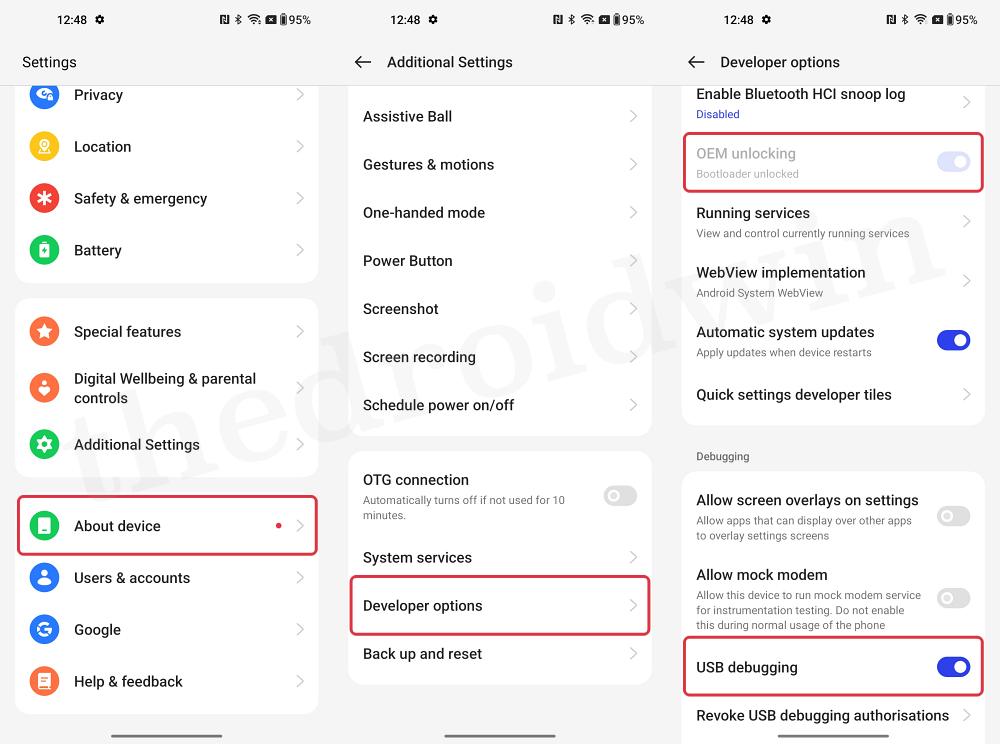
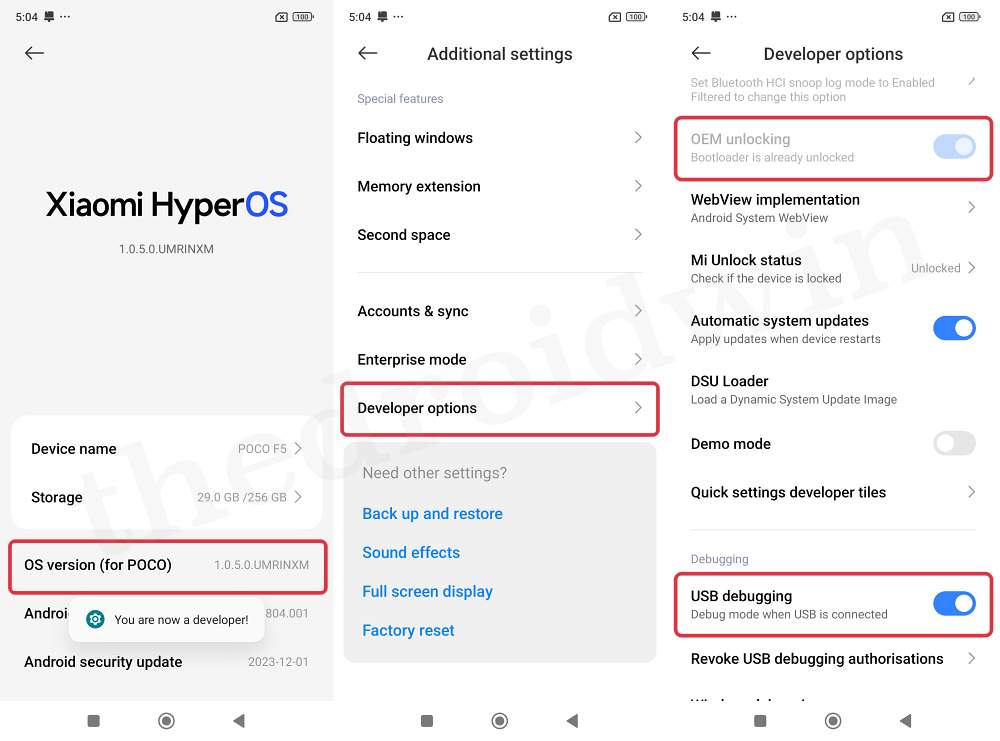
STEP 2: Enable USB Debugging and OEM Unlock
You’ll now have to enable USB Debugging on your device. This will help your PC in identifying that your device is connected in ADB Mode which in turn will alow you to execute the desired ADB Commands. Apart from that, enabling OEM Unlocking is also a must as only then you will be able to unlock the bootloader on your Android device. In this regard, the steps to enable both these options are somewhat different, depending on the phone that you own. So we have listed the steps for numerous OEMs to help you out.
OnePlus
- First off, head over to Settings > About Device > Version > Tap on Build Number 7 times.
- This will enable Developer Options. Go to Settings > Additional Settings > Developer Options.
- Now enable the toggle next to OEM Unlocking and USB Debugging and tap OK in the prompt.
Xiaomi
- First off, head over to Settings > About Phone > Tap on OS version/MIUI Version 7 times.
- This will enable Developer Options. Go to Settings > Additional Settings > Developer Options.
- Now enable the toggle next to OEM Unlocking and USB Debugging and tap OK in the prompt.
Pixel Devices
- Head over to Settings > System > About Phone > Tap on Build Number 7 times.
- This will enable Developer Options. Go to Settings > System > Developer Options.
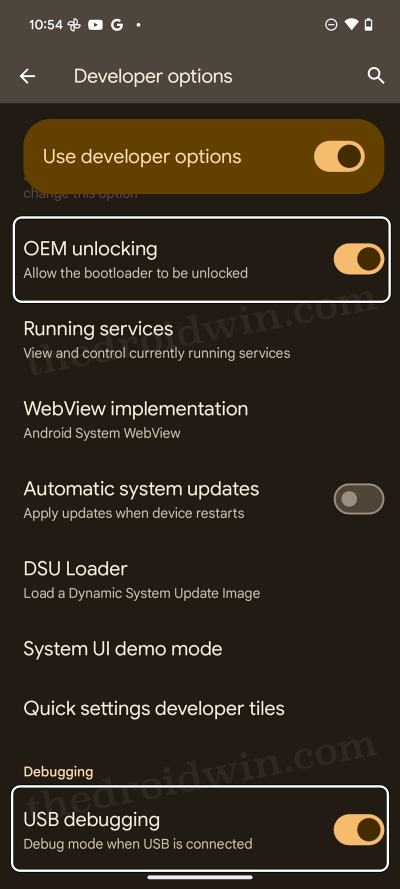
- Now enable the toggle next to OEM Unlocking. You’ll get a prompt, tap on Enable/OK.
- Likewise, enable the USB Debugging toggle. You’ll once again get a prompt, tap Allow/OK.
STEP 4: Boot to Fastboot Mode
- Type in CMD in the platform-tools folder address bar and hit Enter. This will launch the Command Prompt.
- Now type in the below command in the CMD window to boot your device to the Fastboot Mode:
adb reboot bootloader
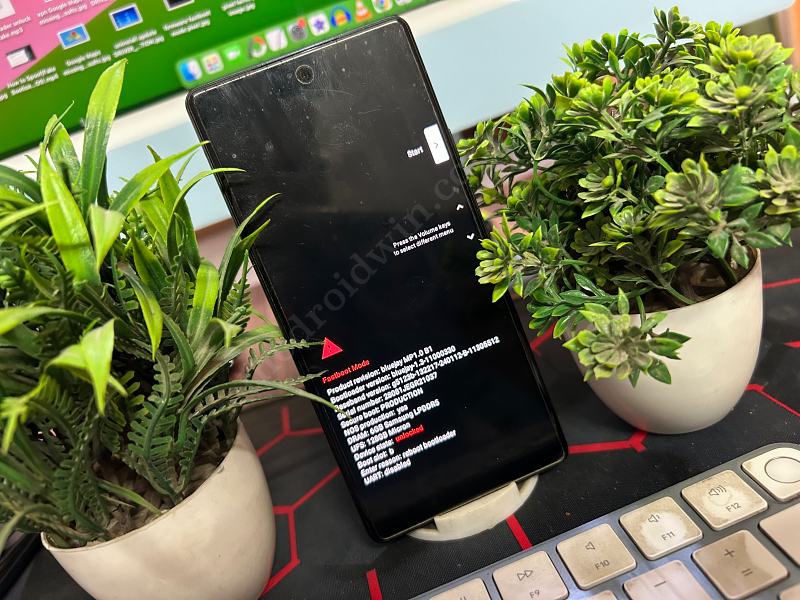
- Then type in the below command and make sure that you are getting a serial ID.
fastboot devices
- If you aren’t getting any ID, then please install Fastboot Drivers on your PC.
STEP 5: Unlock the Bootloader via Fastboot
- From the Fastboot Mode, type in the below command:
fastboot flashing unlock
- You’ll get a prompt on your device, use the Volume key to highlight Unlock the Bootloader and press the power key to confirm.
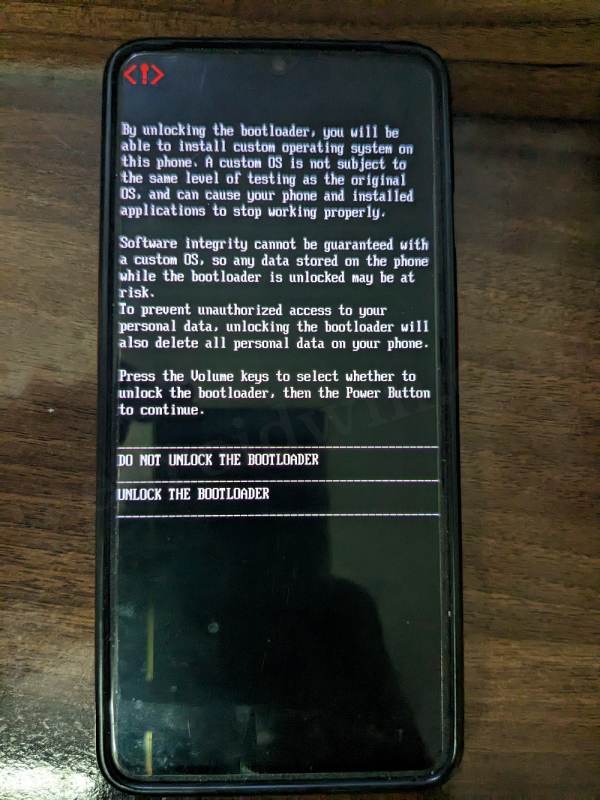
- The device will undergo a reset and the bootloader will be subsequently unlocked. Your device will then boot to the OS.
That’s it. These were the steps to unlock the bootloader on your Android device. If you have any queries concerning the aforementioned steps, do let us know in the comments. We will get back to you with a solution as soon as possible.
An Alternate Command to Unlock The Bootloader
If the fastboot flashing unlock command is not working, then you may also use the below command to get the job done [this is usually true for those devices that were released prior to 2016].
fastboot oem unlock
Is Fastboot Flashing Unlock Supported by all Android Devices?
While the fastboot flashing unlock command works for numerous Android devices, there are a couple of OEMs that don’t support this method, namely Xiaomi and Samsung. If we talk about the former one [including Redmi, Poco, and Mi], then you’ll have to take the help of the Mi Unlock Tool to carry out this task. On the other hand, in the case of Samsung, you’ll have to take the help of Device unlock mode which can be accessed from the Download Mode to get this job done.