
This tutorial will outline the steps to root your device running Android 15 via Magisk. The Silicon Valley giant has recently rolled out the fifteenth iteration of the OS and with that, there are a slew of noteworthy features to look forward to. Some of the intriguing ones include the likes of Partial Screen Sharing, Notification Cooldown, Bluetooth popup dialog, Lock Screen Widgets, Battery Health Percentage, and a slew of under-the-hood tweaks.
However, if we talk about tech enthusiasts, then they have their eyes set on gaining administrative privileges by rooting their Android 15 devices via Magisk. Once they do so, they will be in a position to welcome abode tons of mods and tweaks on their device. So if you are also looking to checkmark this prerequisite off the list, then this guide is all that you would need. Follow along for the instructions.
Benefits and Risks of Rooting
Once you root your device, you will be able to flash Magisk Modules, rooted binaries, and a plethora of other mods and tweaks. Likewise, you could flash a custom kernel and overclock or underclock the kernel as per your device’s need. However, carrying out these tweaks have a few downsides as well.
For starters, the SafetyNet and Play Integrity will be triggered, thereby resulting in your inability to use banking and payment apps. Likewise, Widevine L1 will be downgraded to L3, preventing you from watching DRM content in full HD. Not to mention the fact that rooting requires an unlocked bootloader, which might nullify the device’s warranty. So if that’s all well and good, then let’s get started with the steps to root your device running the latest Android 15 via Magisk.
How to Root Android Devices via Magisk
Before starting, please take a backup of all the data on your device. Thedroidwin.com will not be held responsible if something happens to your device or data by following the below steps.
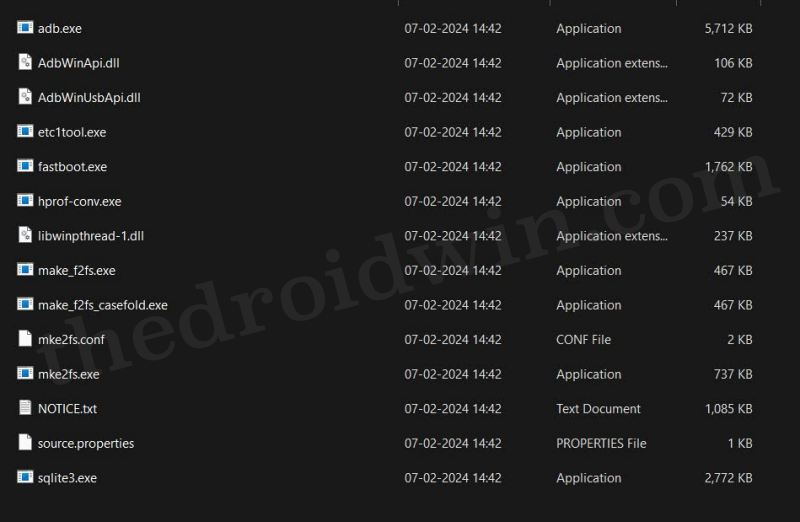
STEP 1: Download Android SDK Platform Tools
First off, download and extract Android SDK Platform Tools on your PC. This is the official ADB Drivers given by Google and is required for executing ADB Commands. This will also act as our working directory as the Command Prompt will be opened inside this folder and all the commands will be executed there itself.
STEP 2: Enable USB Debugging and OEM Unlock
You’ll now have to enable USB Debugging and OEM Unlocking on your device. This is required so that your PC can identify your device in the ADB mode. On the other hand, OEM Unlocking is the prerequisite to unlocking the bootloader on your device. So let’s enable both these toggles right away [depending on the device you own, the steps to enable them might vary, as explained below]:
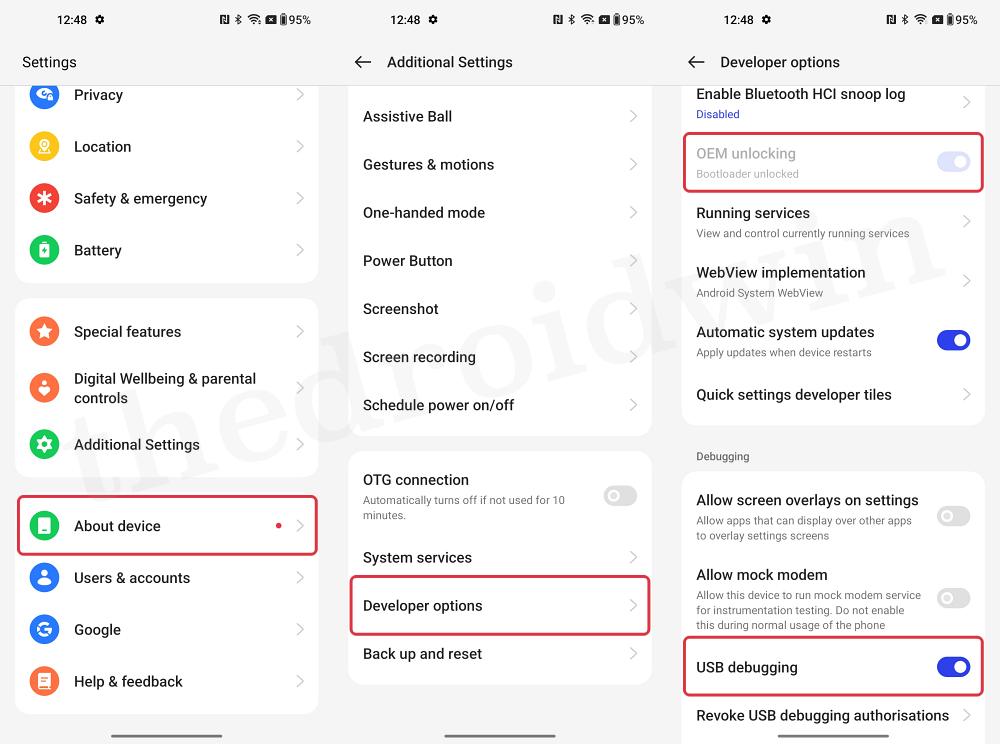
Pixel Devices
- Head over to Settings > System > About Phone > Tap on Build Number 7 times.
- This will enable Developer Options. Go to Settings > System > Developer Options.
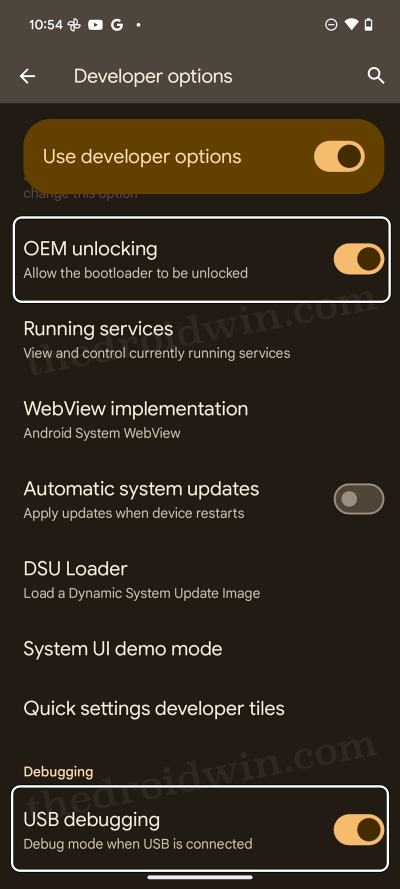
- Now enable the toggle next to OEM Unlocking. You’ll get a prompt, tap on Enable/OK.
- Likewise, enable the USB Debugging toggle. You’ll once again get a prompt, tap Allow/OK.
OnePlus
- First off, head over to Settings > About Device > Version > Tap on Build Number 7 times.
- This will enable Developer Options. Go to Settings > Additional Settings > Developer Options.
- Now enable the toggle next to OEM Unlocking and USB Debugging and tap OK in the prompt.
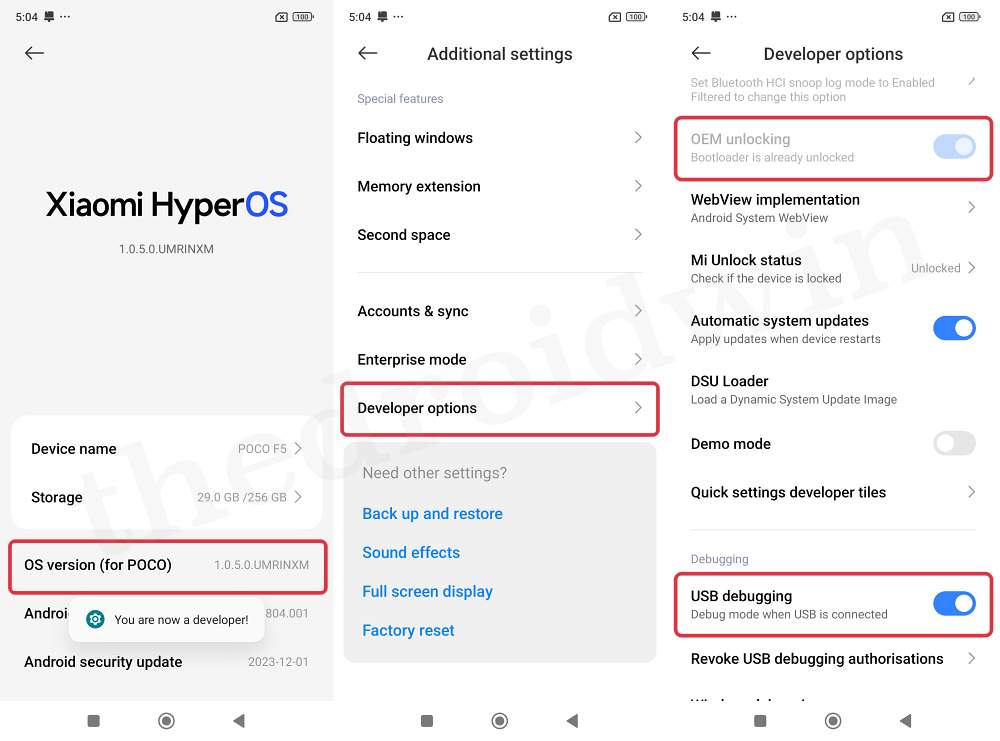
Xiaomi
- First off, head over to Settings > About Phone > Tap on OS version/MIUI Version 7 times.
- This will enable Developer Options. Go to Settings > Additional Settings > Developer Options.
- Now enable the toggle next to OEM Unlocking and USB Debugging and tap OK in the prompt.
STEP 3: Unlock Bootloader
Next up, you’ll now have to unlock the bootloader on your device. Do note that this will wipe off all the data and might make the warranty null and void as well. If that’s well and good, then do refer to our guide on How to Unlock Bootloader on any Android Device. In short, here’s what you need to do:
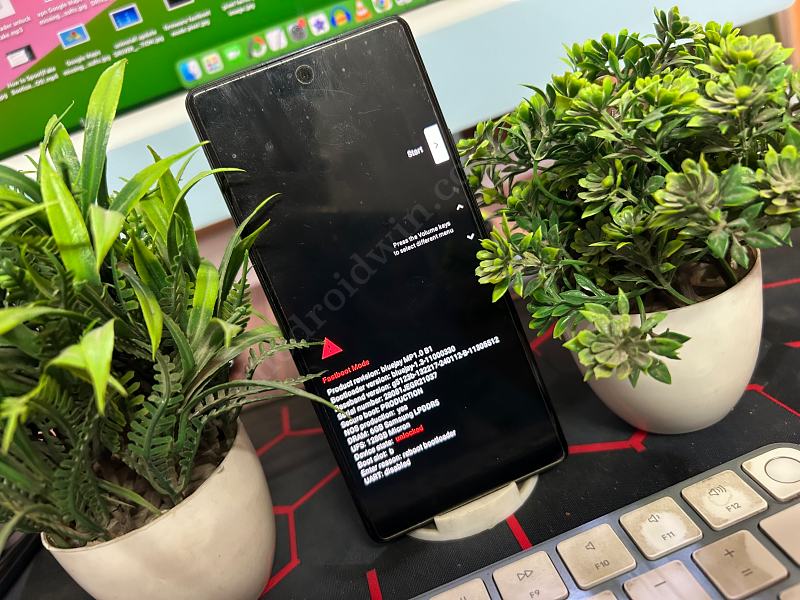
- First off, boot your Android device to Fastboot Mode
- Then use the below command to unlock the bootloader:
fastboot flashing unlock
- You’ll get a confirmation, use the Volume keys to highlight Unlock Bootloader and press the Power key to confirm.
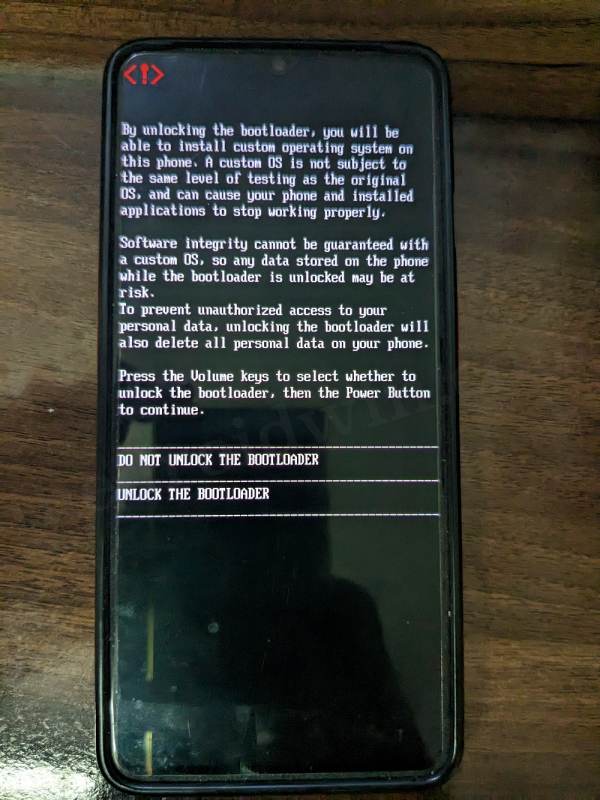
- Your device will undergo a reset and then the bootloader will be unlocked.
STEP 4: Get Boot.img/Init_boot.img
You’ll now have to get hold of the boot.img/init_boot.img file from the stock firmware. Use boot.img if your device came with Android 12 or older version and use init_boot if it came with Android 13 or higher version.
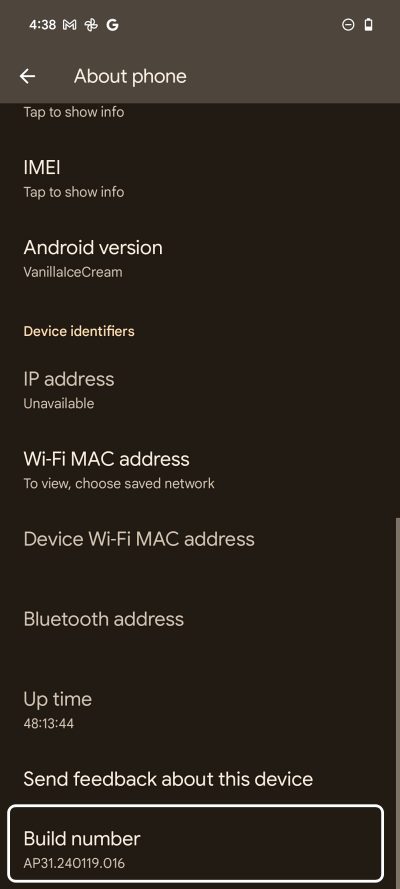
- Download the same firmware that is currently installed on your device.
- You can verify the same from the Build Number/About Phone section.
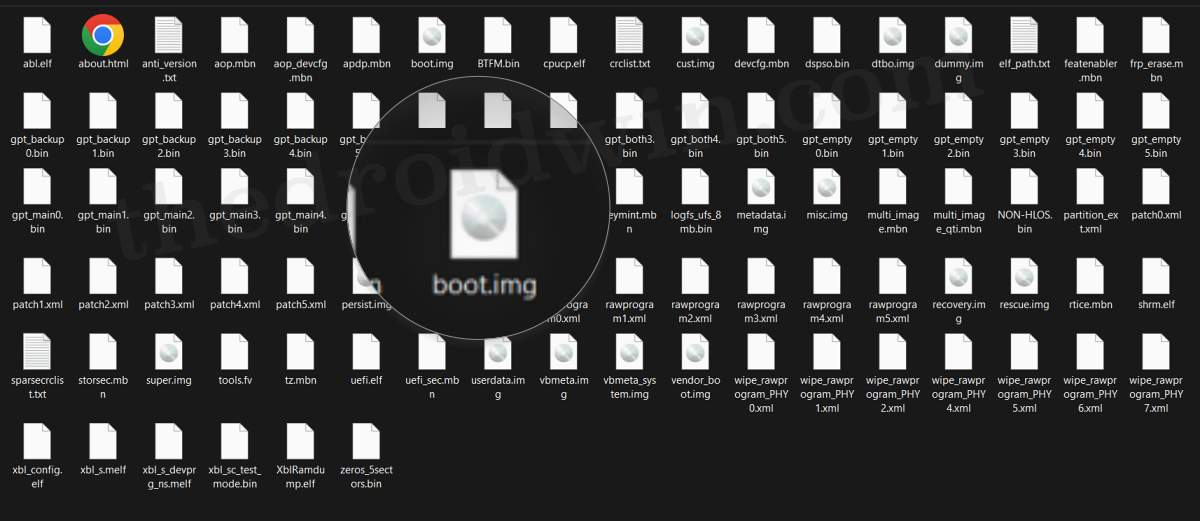
- Once downloaded, extract the boot.img/init_boot.img file from there.
- Here’s how to extract the firmware for some of the popular OEMs:
Pixel: Extract it via the built-in Windows extractor
Xiaomi/Poco/Redmi: Extract TGZ via 7ZIP >Extract TAR via 7ZIP > Go to the Images folder.
OnePlus: Extract payload.bin via Fastboot Enhance Tool
- Once you have got the boot/init_boot file, transfer it to the platform-tools folder.
STEP 5: Patch Boot.img/Init_boot.img
- Now download and install Magisk on your device.
- Then launch it and tap on Install > Select and patch a file.

- Now choose the stock boot/init_boot. Magisk will patch the file and place it inside the Downloads folder.
- Transfer the file to the platform-tools folder and rename it to magisk_patched.img.
STEP 6: Boot to Fastboot Mode
You’ll now have to boot your device to Fastboot Mode. For that, you may either refer to our detailed guide on How to Boot any Android Device to Fastboot Mode or check out the below shorter instructions:
- Type in CMD in the platform-tools folder address bar and hit Enter. This will launch the Command Prompt.
- Now type in the below command in the CMD window to boot your device to Fastboot Mode:
adb reboot bootloader
STEP 7A: Root via Patched Boot.img
If your device came with Android 12 or older versions [and you’re dealing with boot.img], then proceed with the below steps. Or else, refer to STEP 7B.
- Use the below command to temporarily boot your device via Magisk patched boot.img:
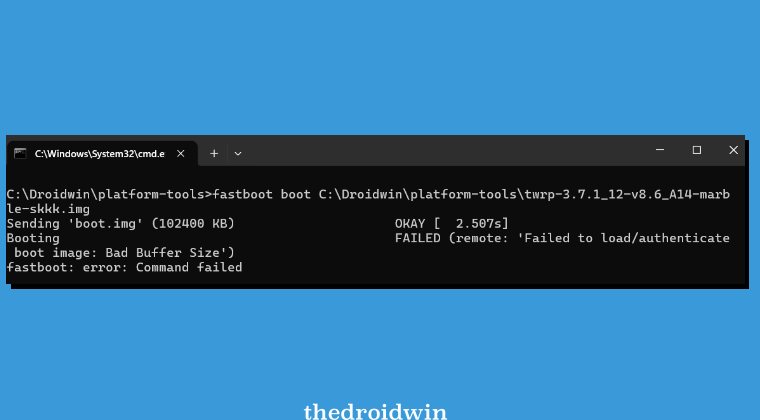
fastboot boot magisk_patched.img
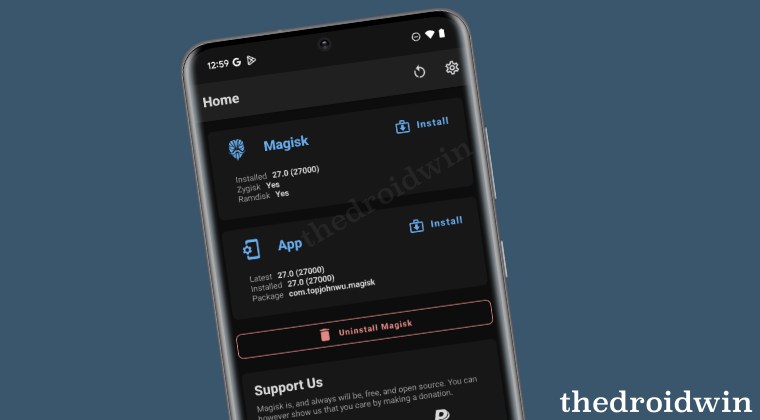
- Now launch the Magisk app, tap on Install next to Magisk, and select Direct Install.
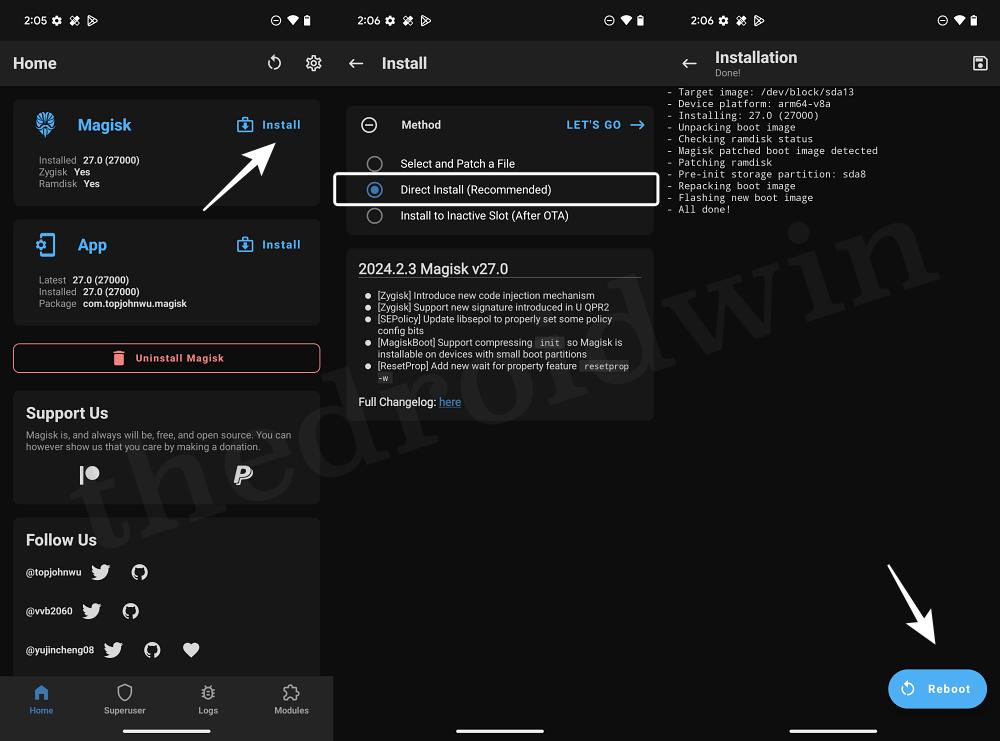
- Your device will undergo a reboot. Once it boots up, launch Magisk. It will ask you to install additional dependencies, tap OK.
- Your device will again undergo a restart. But this time around when it boots up, you would have obtained permanent root.
STEP 7B: Root via Patched Boot.img
If your device came with Android 13 or higher versions [and you’re dealing with init_boot.img], then refer to the below steps
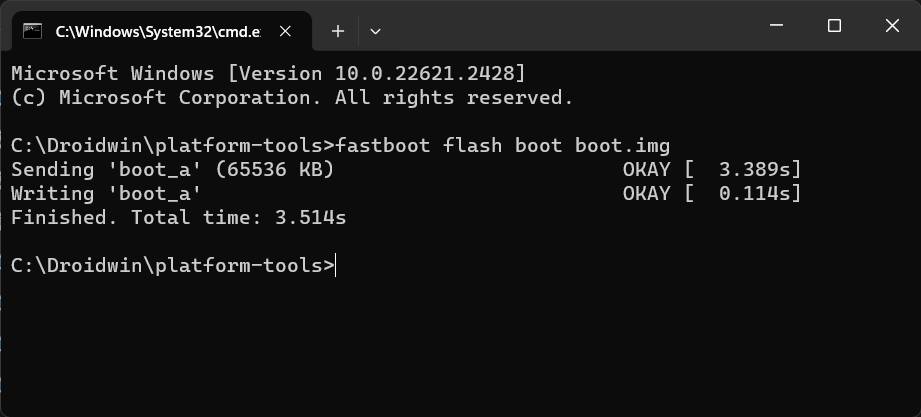
- Type in the below command to permanently flash the patched init_boot file:
fastboot flash init_boot magisk_patched.img
- Then use the below command to boot your device to the OS:
fastboot reboot
- Now launch Magisk. It might ask you to install additional dependencies, tap OK.
- Your device will again undergo a restart and boot to the rooted OS.
Fastboot boot vs Fastboot Flash” Which Command to Use
When it comes to rooting via boot.img, you could take two different approaches, either temporary boot via the fastboot boot [which we have done in STEP 7A], or directly flash the patched boot.img. If you choose the second method, then you’ll have to use the fastboot flash boot magisk_patched.img. So instead of first temporarily booting via the patched root and then doing a Direct Install via Magisk, you could simply flash the patched boot and obtain root in one go.
This would translate to a shorter and easier way of getting this job done as compared to fastboot boot. So why then we opt for the longer route? Well, this is because directly flashing the patched boot is quite a risky approach because if something is wrong with the patched file and you end up flashing it, then your device will straightaway end up in a bootloop or soft-brick state.
On the other hand, if something is wrong with the patched boot but you use the fastboot boot command, then a simple reboot of the device will replace the corrupt patched boot.img with the stock one and your device will then boot to the OS without any issues. That is why it is highly recommended that you use the fastboot boot command instead of the fastboot flash.
But what about the init_boot.img? Well, init_boot doesn’t support temporary booting and you have no choice but to opt for directly flashing them [that is the reason why we listed that instruction only in STEP 7B. So with this, you would haver got a decent idea as to why we opted for the fastboot boot method to root your Android device via Magisk. But if you still have any queries, then do let us know via the comments section below.
How to Root Android via TWRP
Rooting an Android device via TWRP is easier and shorter as compared with its counterpart, with the biggest plus point being the fact that you don’t even have to download the stock firmware! The only reason why it doesn’t get much attention is due to the fact that not every device has a working custom recovery. But if your device is blessed with it, then you could consider opting for this method to get the job done, as explained in the below-linked guide: