In this guide, we will show you two different methods through which you can install custom ROMs on your Android device. Every OEM comes with its own set of customized OS skin. While the likes of Pixel offer you a clean stock OS experience, others like MIUI from Xiaomi or OxygenOS [or should we call it ColorOS] from OnePlus are filled with tons of customizations and tweaks. However, each of these skins has its own set of caveats as well.
For instance, on Pixel devices, some users are left disappointed due to the lack of tweaks and modifications whereas on Xiaomi, it is just the reverse- it beholds a slew of unnecessary features and bloatware. Not to mention the fact that each of these OEMs has set a specific time period till your device will receive official OS upgrades.
For instance, Asus usually gives only 2 years and some of the other players might give you an additional year [the sole exception being Pixel and Samsung, both of which offer a whopping 7 years of PS upgrades, but only for the device being released from now onwards, this change will not reflect on its older devices].
So to overcome all these issues, your best bet is to welcome customized firmware onto your device. And in this guide, we will show you how to do just that. But before we make you aware of two different methods to install a custom ROM on your Android device, let’s first go through the risks and benefits involved with them.
Benefits and Risks of Custom ROMs
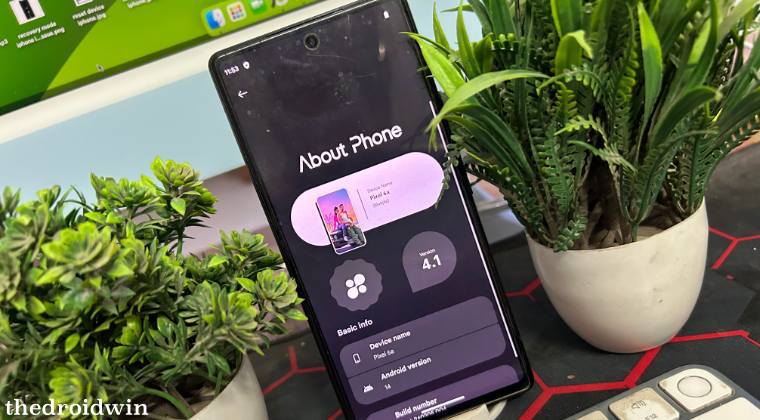
The biggest advantage with custom ROMs is the fact that your device will be blessed with OS upgrades way beyond the official schedule. For instance, Poco F1’s last official OS update was Android 11 out of the box but has recently received the latest Android 14 update from numerous ROM developers. Apart from that, these ROMs also offer you tons of customizations, tweaks, and modules that you could use to get more out of your device.
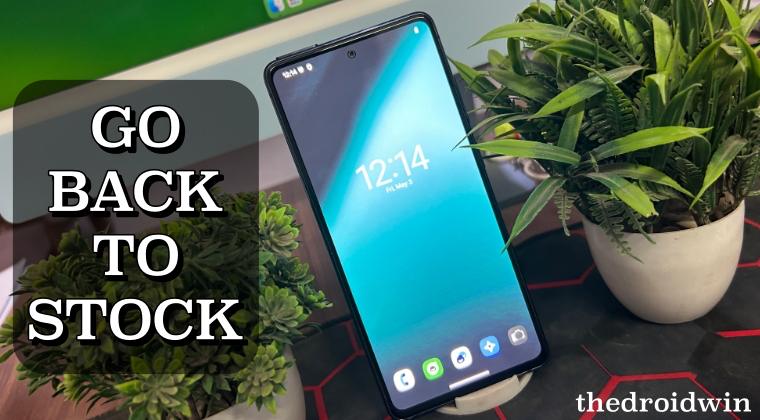
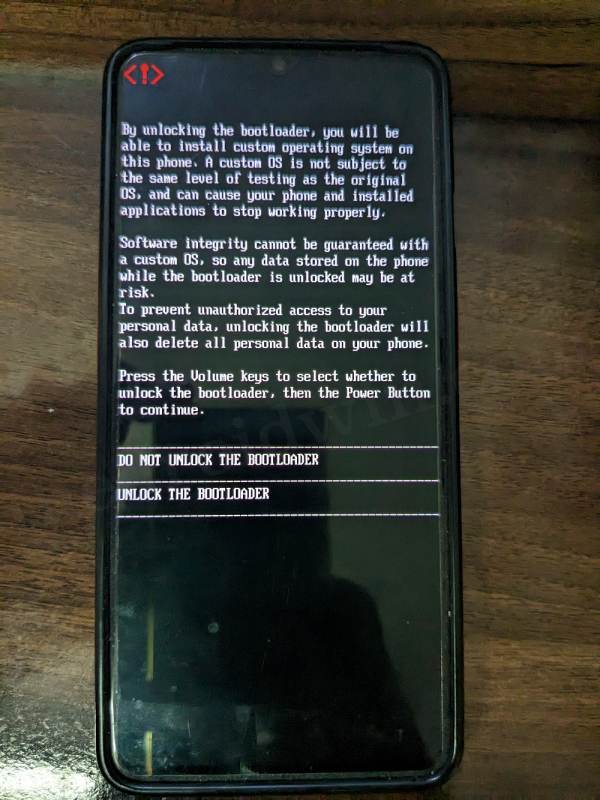
On the flip side though, flashing these ROMs requires an unlocked bootloader. Not only this will wipe off all the data, but might also nullify the warranty in some cases. Likewise, if you are using an unofficial build, then the developer might suddenly drop the support for their ROM, thereby leaving you with no option but to go back to the stock ecosystem. So if that’s all well and good, then let’s get started with the steps to flash custom ROMs on your Android device.
How to Install Custom ROMs on Android
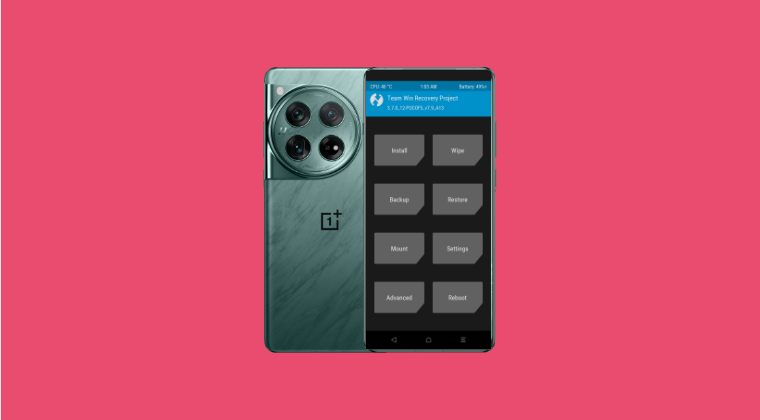
There exist three different methods through which you could flash a ROM- via a custom recovery like TWRP Recovery or by using Fastboot Commands. It is highly recommended that you use the first method [custom recovery] to get this job done. However, if your device does not have a working recovery, then you’ll have no choice but to opt for the Fastboot Method.
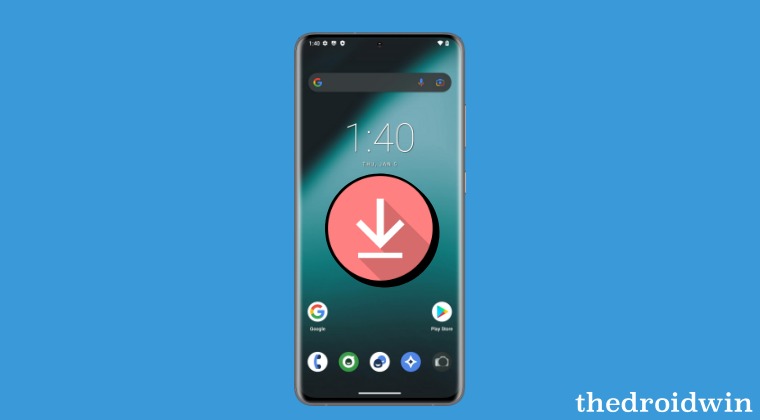
Moreover, if you are flashing the latest version of the ROM, then it is highly recommended that you be on the latest version of the stock firmware too. You may download the pending updates from the Settings > System section. With that said, in rare/exception cases, some developers might ask you to be on an older firmware version. So make sure to double-check if that is the case or not [in most instances, that wouldn’t be the case].
Moreover, irrespective of the method you opt for, the flashing process will wipe off all the data from your device. So make sure to take a complete device backup beforehand. Thedroidwin.com will not be held responsible if something happens to your device or data after performing the below steps.
Via TWRP Recovery
- First off, unlock the bootloader on your device.
- Then download and install TWRP Recovery on your device.
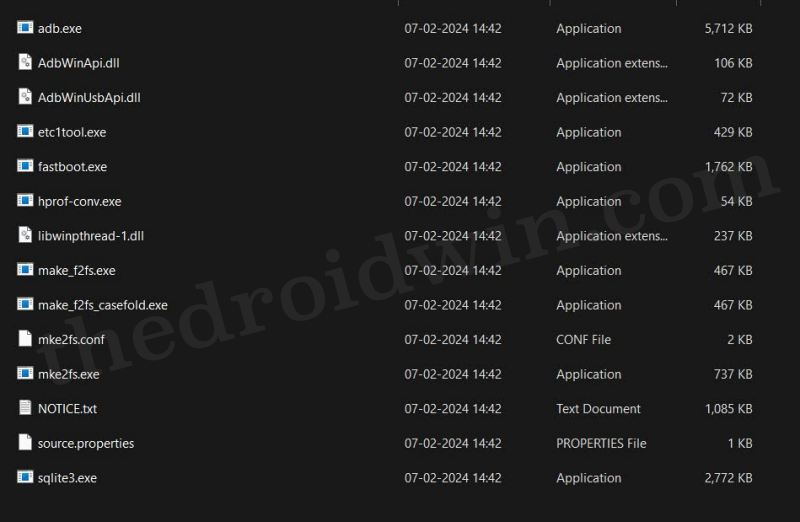
- Now download and extract Android SDK Platform Tools on your PC.
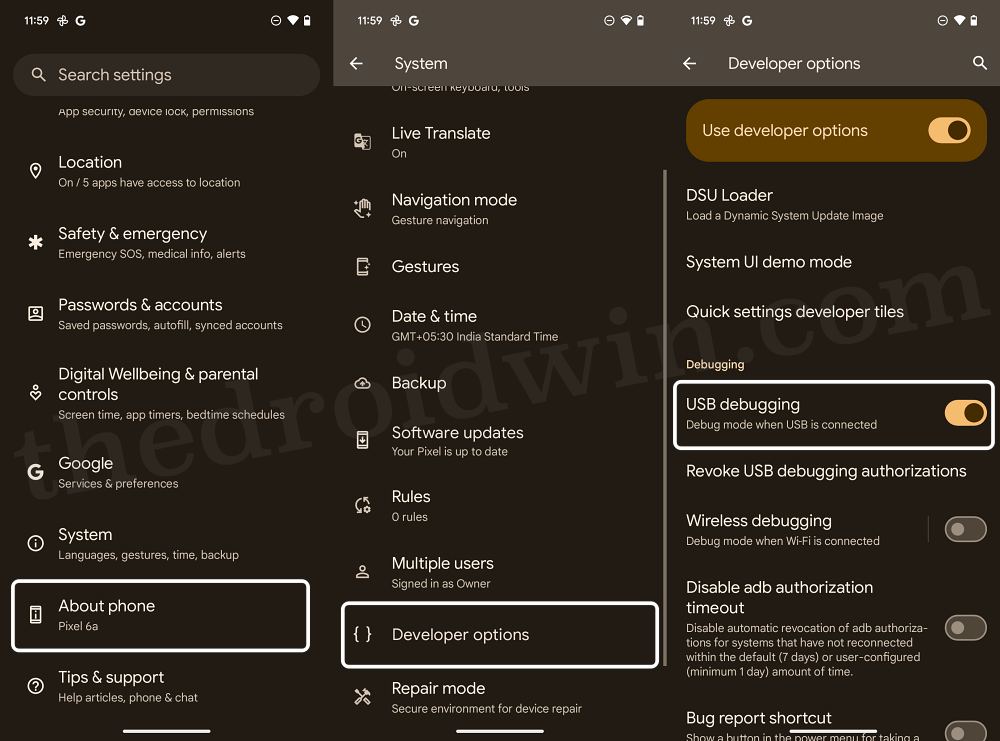
- Then enable USB Debugging and connect your device to PC via USB.
- Now open Command Prompt inside the platform-tools folder.
- Then type in the below command to boot your device to TWRP:
adb reboot recovery
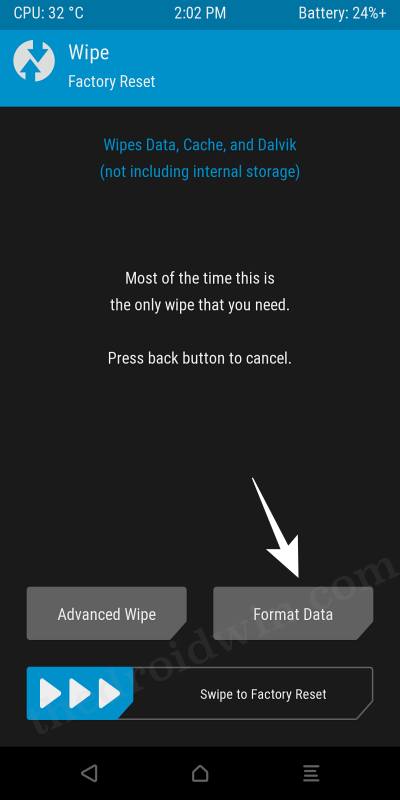
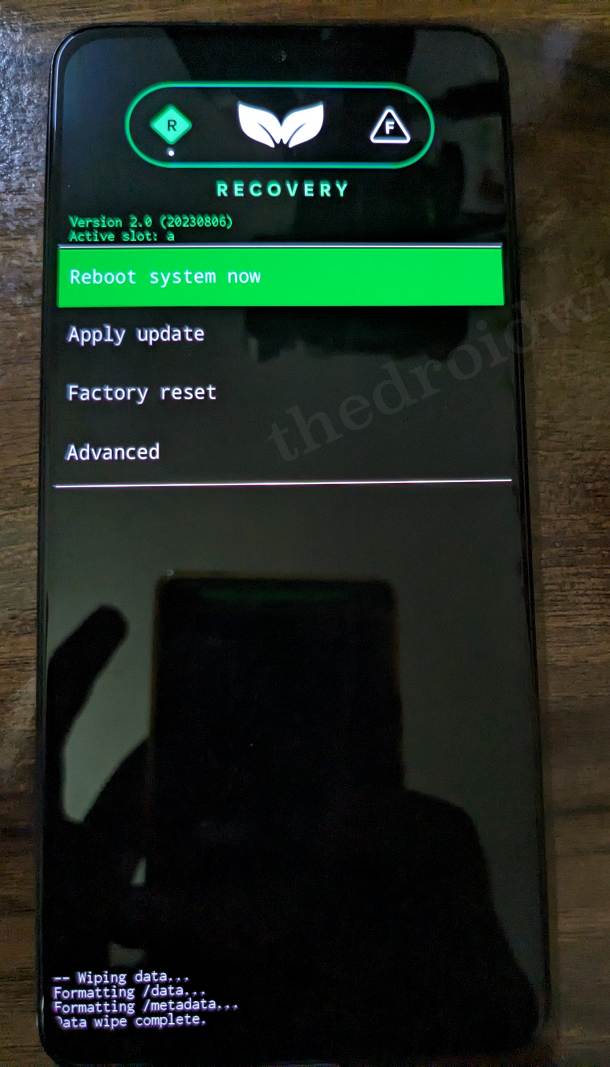
- Now go to Wipe > Format Data > type in YES > hit the blue checkmark.
- Then transfer the ROM ZIP file to your device.
- Now go to Install > select the ROM ZIP > do a right swipe to flash it.
- Once done, again go to Wipe > Format Data > type in YES > hit the checkmark.
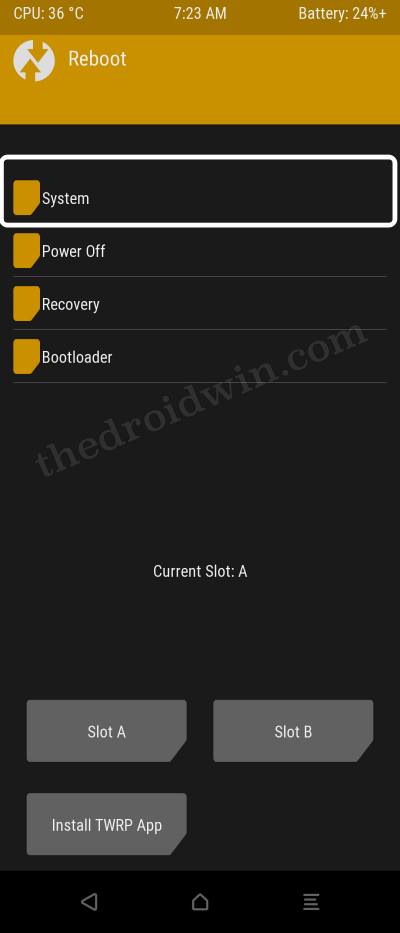
- Finally, select Reboot > System. Your device will now boot to the OS.
Do note that the first boot-up will take up some additional time, this is completely normal and nothing to worry about.
Via Fastboot Commands
- First off, download and extract Android SDK Platform Tools on your PC.
- Then download the desired ROM ZIP file and place it inside platform tools.
- Apart from that, the ROM might also have a couple of partition files, such as boot, dtbo, vendor_boot, vbmeta, recovery, etc.
- So transfer those IMG files to the platform-tools folder as well.
- Then enable USB Debugging and connect your device to your PC via USB.
- Now open Command Prompt inside the platform-tools folder.
- Then unlock the bootloader on your device.
- Then execute the below commands to flash each of these files [only use the commands whose files you have]
- Next up, flash the boot.img file as follows:
fastboot flash boot boot.img
fastboot flash vendor_boot vendor_boot.img
fastboot flash vendor vendor.img
fastboot flash vbmeta vbmeta.img
fastboot flash dtbo dtbo.img
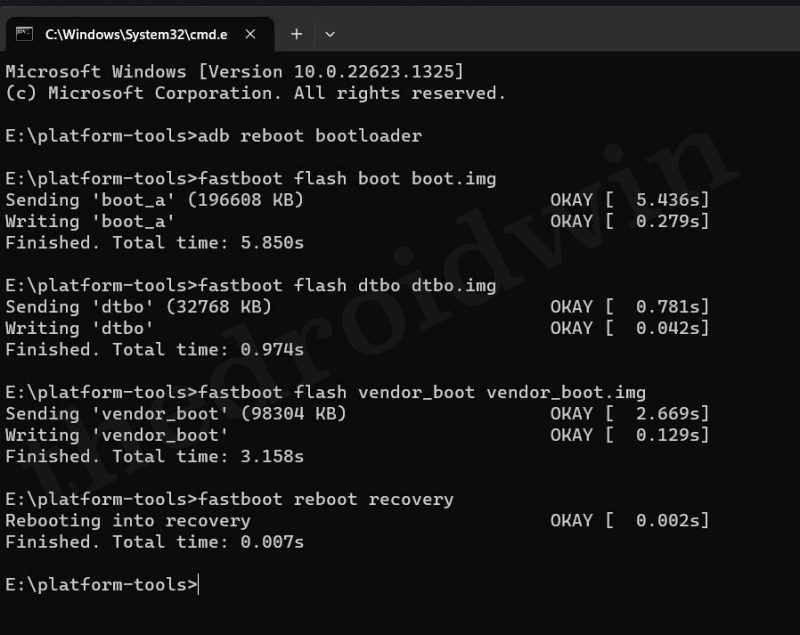
- Once the required files have been flashed, reboot to recovery via the below command:
fastboot reboot recovery
- Now select Format Data > Factory Reset and delete all the data from your device.
- Once done, select ADB Sideload/Apply Update from ADB from the recovery.
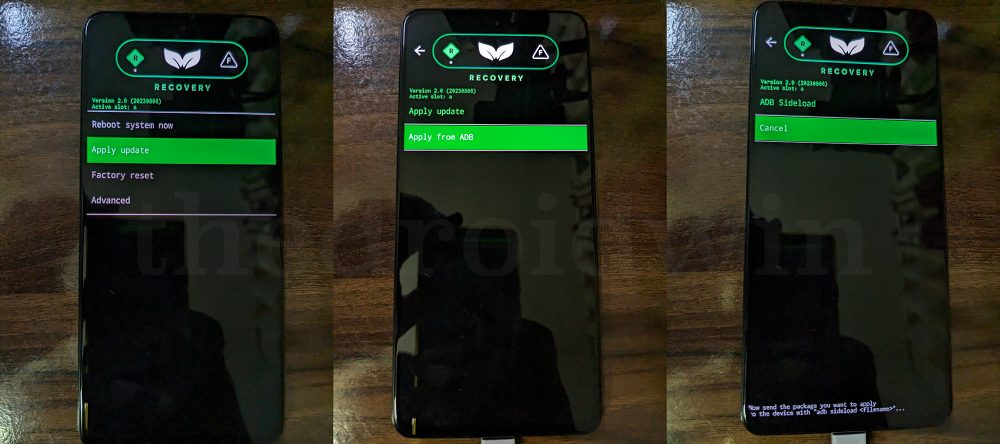
- Then type in the below command in the CDM window to start the sideload:
adb sideload rom.zip
- Once flashed, you’ll get a prompt. If you wish to flash any other ZIP file, tap on YES. Or else, tap No and go to Step 18.
- Your device will reboot to recovery and you may then do the sideload of the desired file.
- It is now recommended that you do a Format Data once again, just to be on the safer side.
- Finally, select Reboot to System. Your device will boot to the newly flashed OS.
- Do note that the first boot-up will take some time, this is completely normal and nothing to worry about.
That’s it. These were two different methods through which you could install custom ROMs on your Android device. If you have any queries concerning the aforementioned steps, do let us know in the comments. We will get back to you with a solution as soon as possible.