If you are planning to step into custom development, then your first course of action should be to get hold of the Android SDK Platform Tools. However, that isn’t the only prerequisite that you need to checkmark off the list- you’ll also have to enable USB Debugging on your device. Until and unless you do so, your PC won’t be able to identify your device in ADB Mode and hence you won’t be able to execute any commands whatsoever.
However, to prevent general users from unintentionally enabling this advanced feature, Google has hidden it inside the OS. As a result of this, you wouldn’t be able to access it until and unless you manually unlock it using a nifty method. Moreover, irrespective of the device you own, every OEM has respected this decision and has implemented the functionality in the same manner, i.e. hiding it from the generic users. But fret not! This guide will help you unearth this hidden treasury in just a few steps. Follow along for the instructions.
What’s the Benefit of Enabling USB Debugging?
Once you enable USB Debugging, you’ll be in a position to execute every kind of ADB command. Some of the noteworthy ones include the likes of:
adb reboot recovery // Reboot to Recovery [both stock and custom]

adb reboot bootloader // Reboot to Bootloader/Fastboot

adb shell // Open a Shell Environment

and reboot edl // Reboot to EDL

adb reboot fastboot // Reboot to FastbootD

adb install filename.apk // Install an APK

adb sideload filename.zip // Install a ZIP File

adb kill-server // Stop the existing ADB Server

adb start-server // Start a new ADB Server
These are just some of the useful ADB commands, there are a plethora of others that you will come across in your day-to-day usage of the device. With that said, let’s now make you aware of the steps to enable USB Debugging on your device.
How to Enable USB Debugging on Android Devices
Every OEM follows a slightly different path when it comes to enabling Debugging. So we have listed the detailed steps for three of the most popular smartphone manufacturers out there, if yours is not a part of this list, then do let us know in the comments section below.
Pixel Devices
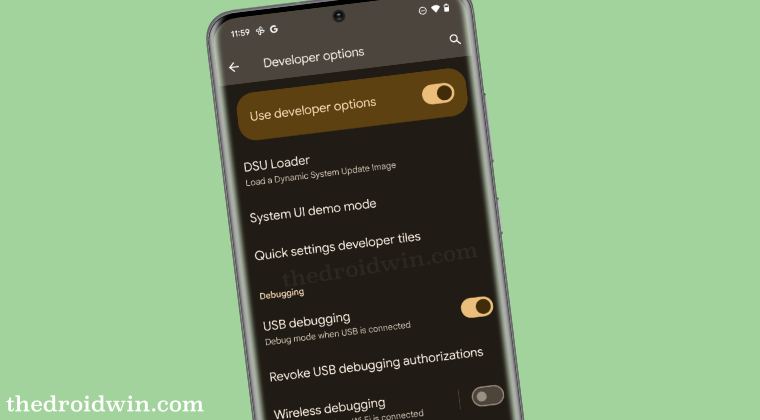
- Head over to Settings > System > About Phone > Tap on Build Number 7 times.
- This will enable Developer Options. Go to Settings > System > Developer Options.
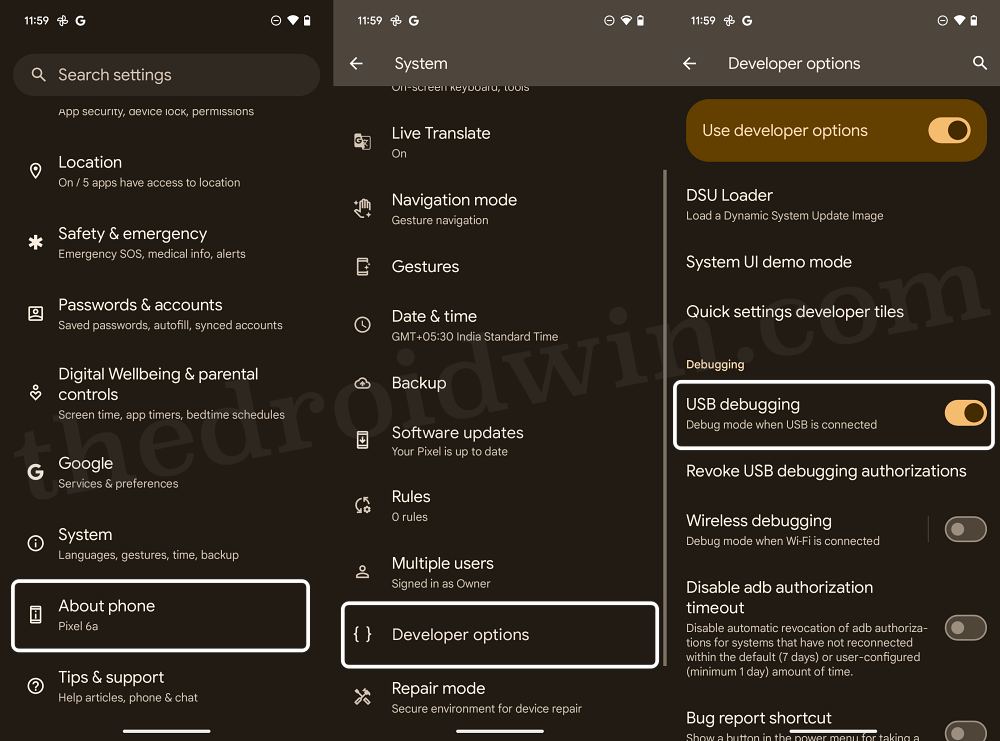
- Now enable the toggle next to OEM Unlocking. You’ll get a prompt, tap on Enable/OK.
- Likewise, enable the USB Debugging toggle. You’ll once again get a prompt, tap Allow/OK.
OnePlus
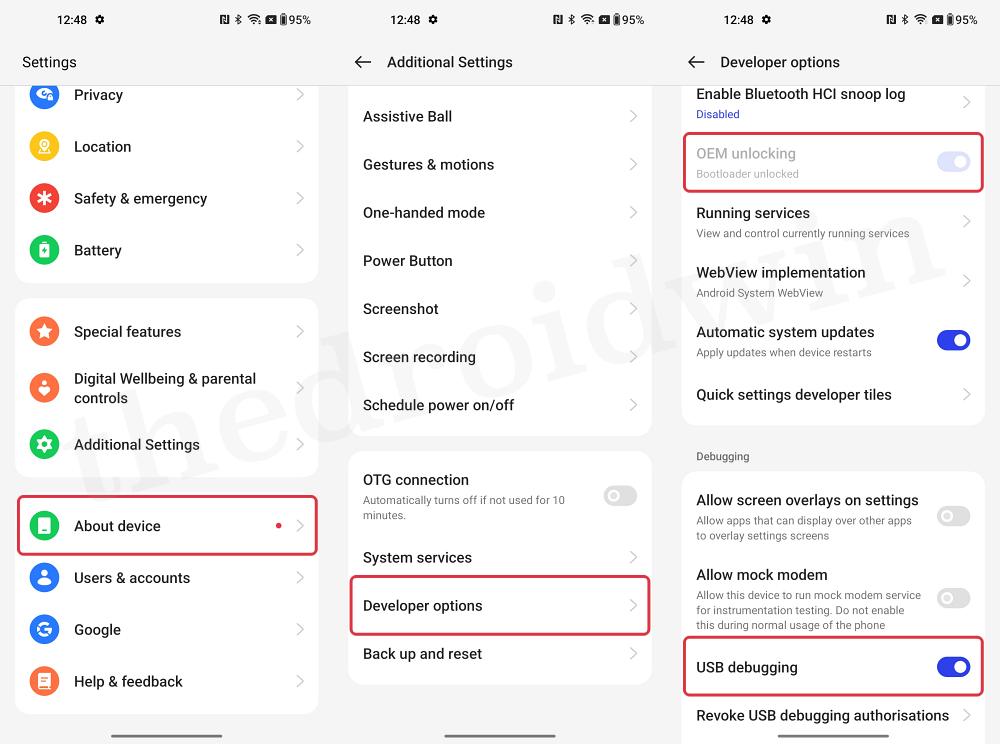
- First off, head over to Settings > About Device > Version > Tap on Build Number 7 times.
- This will enable Developer Options. Go to Settings > Additional Settings > Developer Options.
- Now enable the toggle next to OEM Unlocking and USB Debugging and tap OK in the prompt.
Samsung
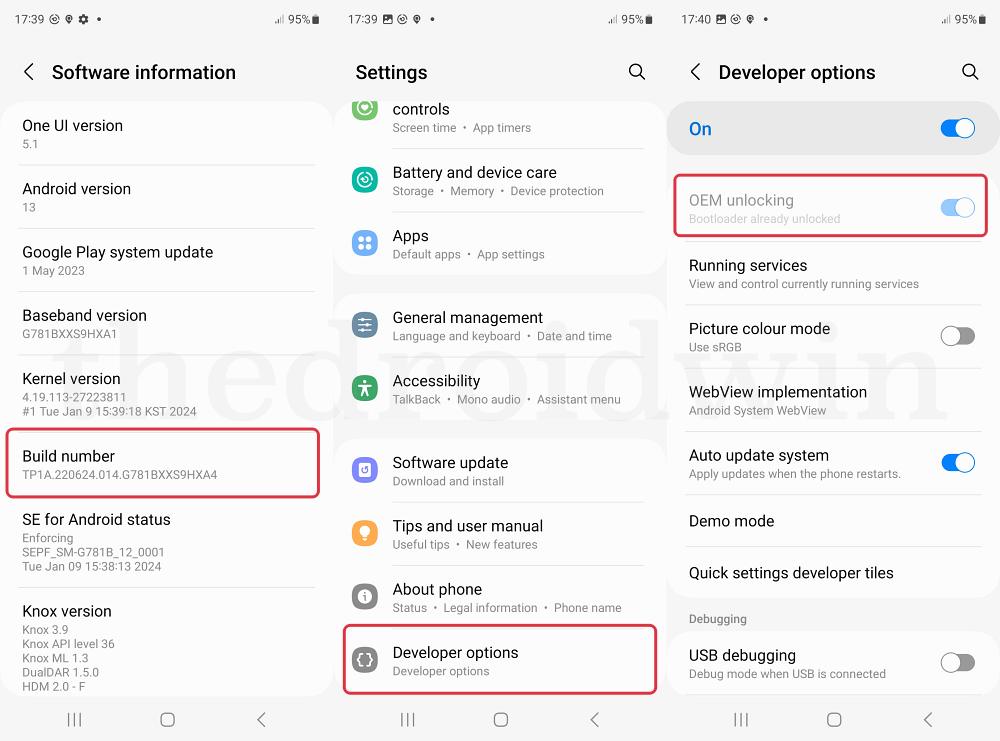
- First off, head over to Settings > About Phone > Software Information.
- Then tap on Build Number 7 times. This will enable Developer Options.
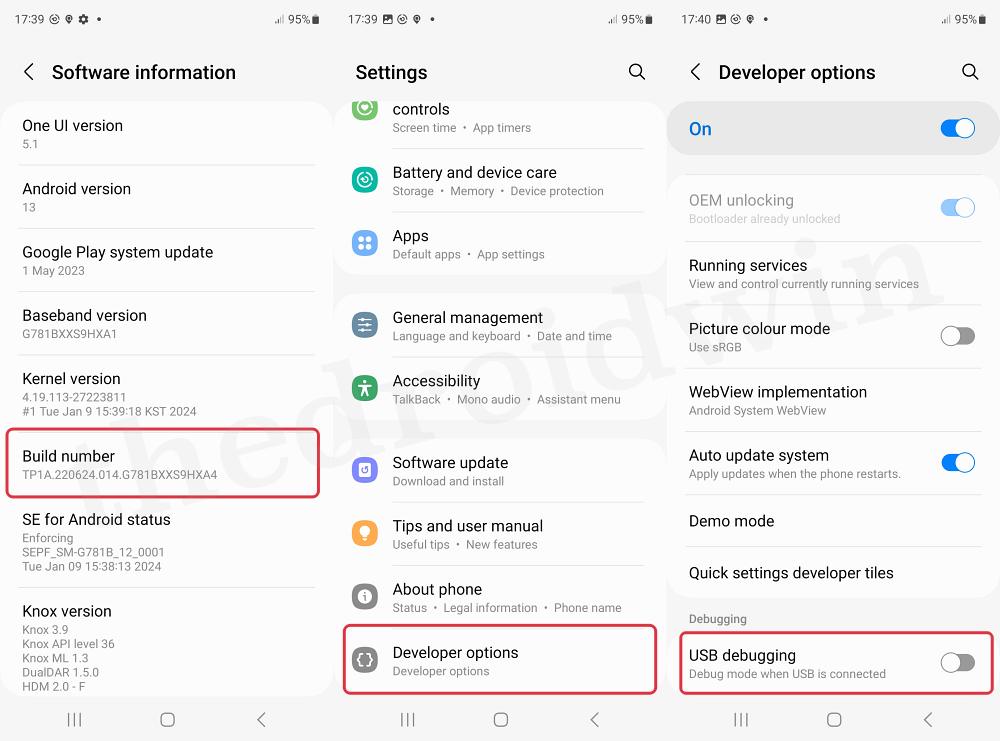
- Now go to Settings > Developer Options and enable the USB Debugging.
- Likewise, also enable OEM Unlocking and hit Allow/OK in the prompt.
Xiaomi
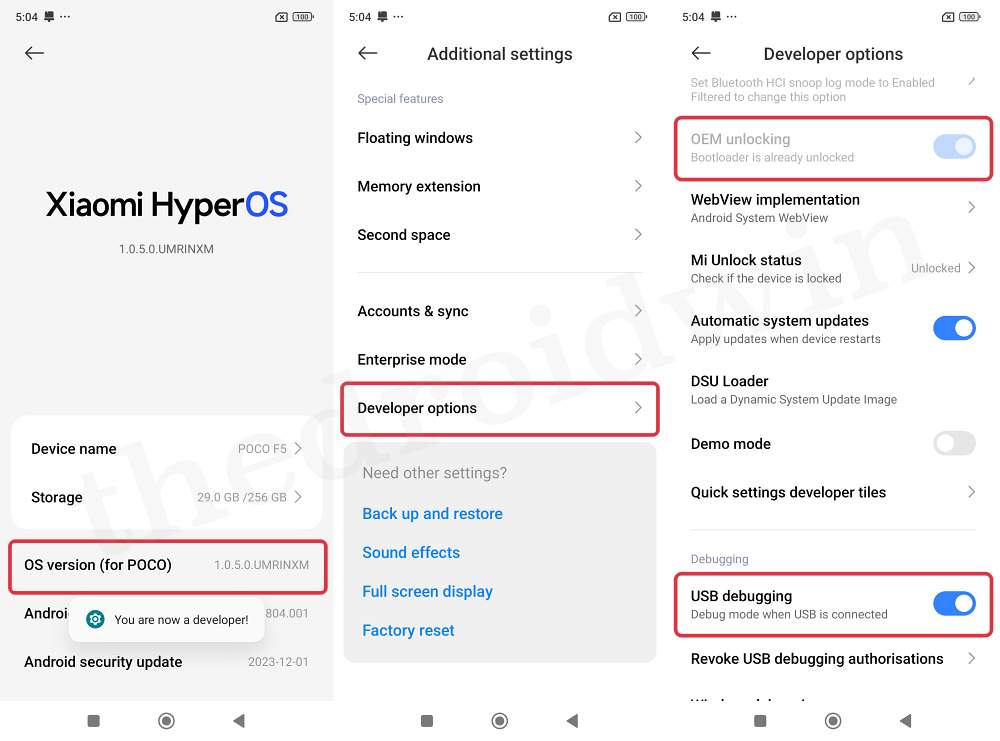
- First off, head over to Settings > About Phone > Tap on OS version/MIUI Version 7 times.
- This will enable Developer Options. Go to Settings > Additional Settings > Developer Options.
- Now enable the toggle next to OEM Unlocking and USB Debugging and tap OK in the prompt.
A Note on “Allow RSA Key Fingerprint“: If this is the first time you have enabled Debugging, then upon connecting your device to a PC via USB, you’ll get an RSA key prompt, so make to Allow/Grant it. This RSA key is unique for every PC, so if you connect your device to another PC, you’ll once again have to grant it.
How to Verify if USB Debugging is Enabled?
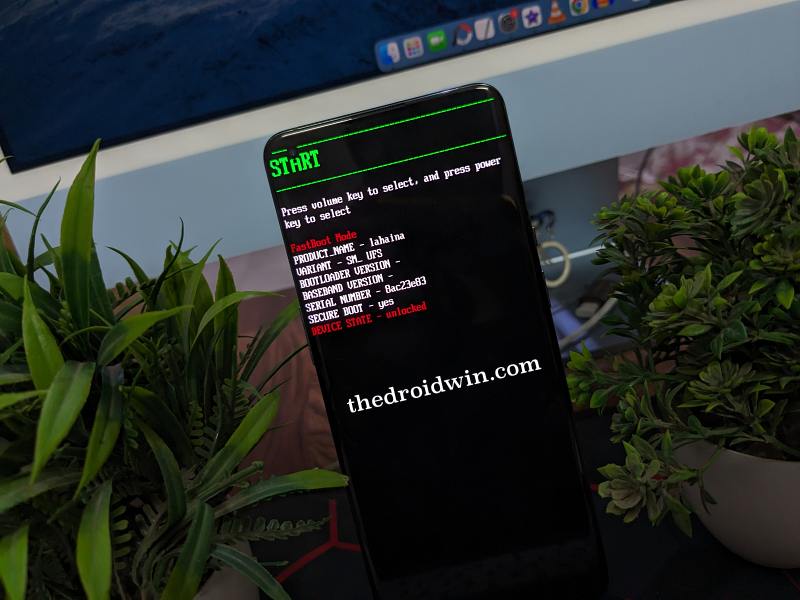
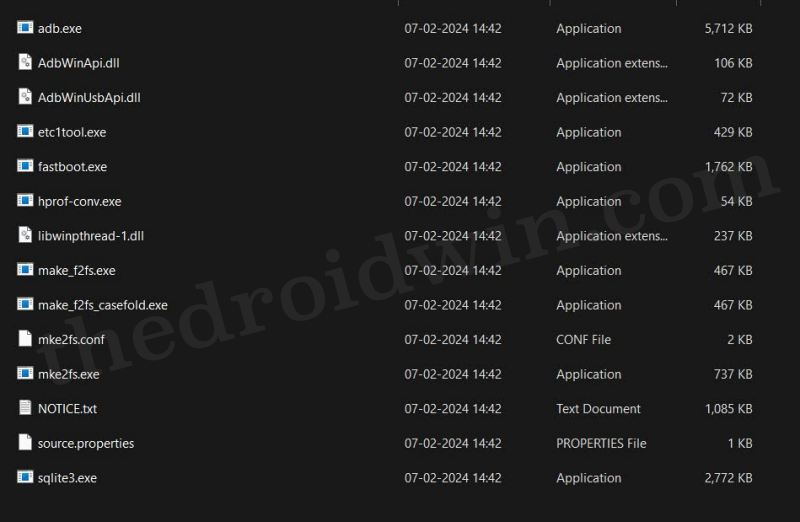
- Download and extract the Android SDK Platform Tools on your PC.
- Then enable USB Debugging and connect your device to PC via USB.
- Type in CMD in the platform-tools folder address bar and hit Enter.
- This will launch Command Prompt. Now type in the below command:
adb devices
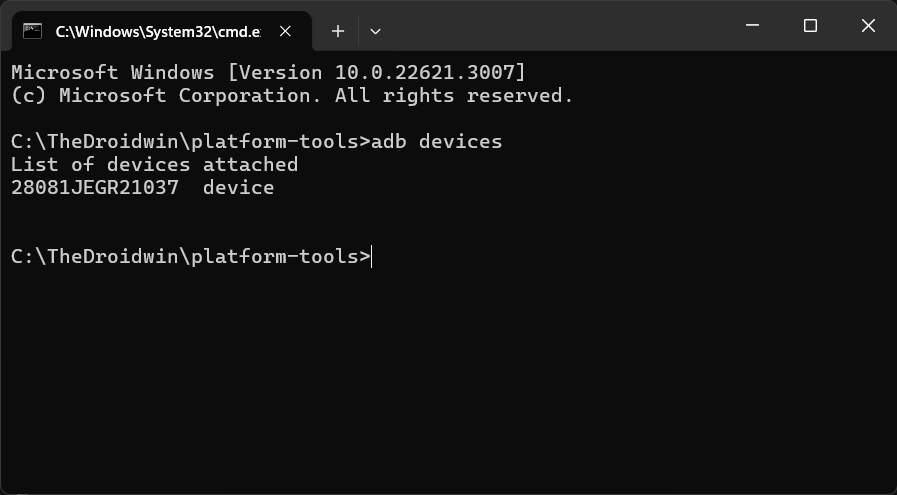
- You’ll now get a serial ID, signifying that Debugging has been enabled.
- However, if you are not getting any ID, then check out the below fixes.
Is USB Debugging not working? Try These Fixes!
If the USB Debugging not working on your Android device, then give a shot at the below-listed fixes and one of them should definitely rectify the underlying issue.
FIX 1: Try USB Tweaks
First off, try using the USB cable that came with your phone or at least an official USB cable from a different phone. This is because there are many local USB cables out there that only support device charging and don’t come with support for file transfers, let alone ADB Commands.
Along the same lines, it is recommended that you use the USB 2.0 ports on your PC instead of the 3.0. While the latter is a mich faster one, it has been known to conflict with the code execution process. So use an official USB cable, plug in your device to the USB 2.0 port on your PC, and then check if USB Debugging is working on your device or not.
FIX 2: Toggle USB Debugging
You might also get bugged by this issue if Debugging’s underlying settings get corrupted. Therefore, you should consider disabling and then re-enabling it, using the instructions given below.
- Go to Settings > System > Developer Options.
- Now disable the toggle next to USB Debugging.
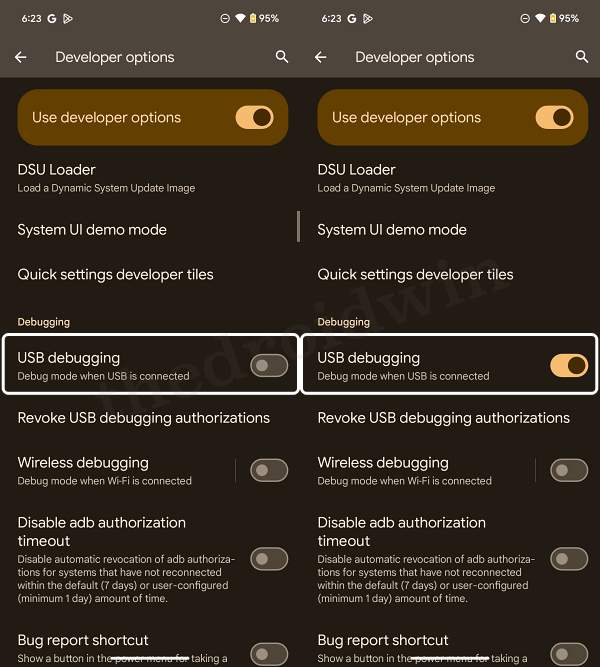
- Wait for a few seconds and re-enable the toggle.
- Check if USB Debugging is now working or not.
FIX 3: ReAuthorize USB Debugging
Next up, you should consider revoking the authorization of the USB Debugging and then reauthorizing it. Here’s how it could be done:
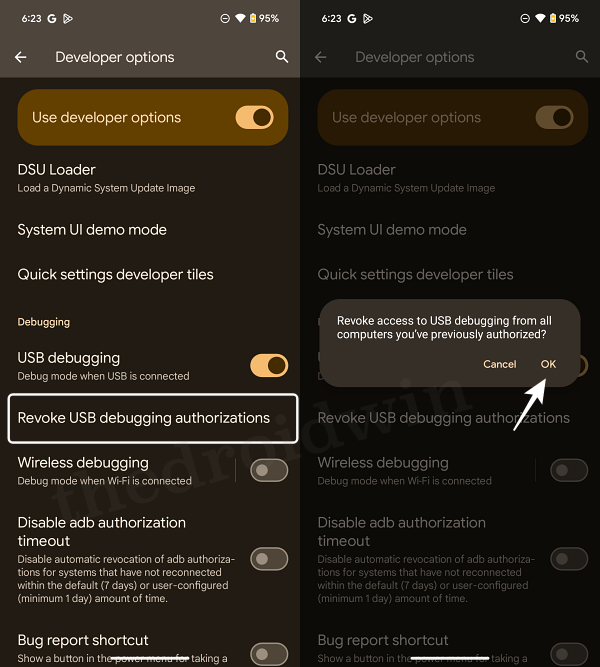
- Head over to Settings > System > Developer Options.
- Then tap on Revoke USB Debugging Authorizations.
- Now plug in your device to your PC via a USB cable.
- Then open Command Prompt inside platform tools.
- Now type in the below command in the CMD window:
adb devices
- You’ll get an authorization prompt on your device, tap Allow.
- Now check if the USB Debugging is working on your device.
That’s it. These were the various methods to enable USB Debugging on your Android device. Likewise, we have also shared various methods to rectify the issue of Debugging not working. Still, have any doubts? The comments section is all yours, make your voices heard and we’ll chalk out the best fix for you.