In this guide, we will be listing the steps to install the Viper4Android on any device running Android 14. Every OEM usually picks up one specific domain, focuses on it, and then tries to make a name for itself in that category. In this regard, Pixel is known for its best camera quality, Xiaomi for offering budget-friendly devices, Nothing for having one of the most unique UI/UX, thanks to the Glyph interface, and so on. Unfortunately, none of them have their eyes set on the audio domain. And we can’t blame them either.
For the majority of the users out there, the default audio quality is more than enough to checkmark their daily requirements. And if that is not the case, then there’s always the option to buy a decent headset and get the job done. But for the audiophiles and tech enthusiasts, the defacto audio quality might not be enough and they would want to enhance it to its absolute best aka its maximum potential. If you also echo the same thought process, then this guide will help you out. Follow along for the instructions.
How to Install Viper4Android on Android 14
METHOD 1
- To begin with, root your device via Magisk.
- Then download the ViPER4Android-RE Magisk module from GitHub.
- After that, download the ViPER4Android-RE app from GitHub as well.
- Then launch Magisk, go to Modules, and tap on the Install from Storage.
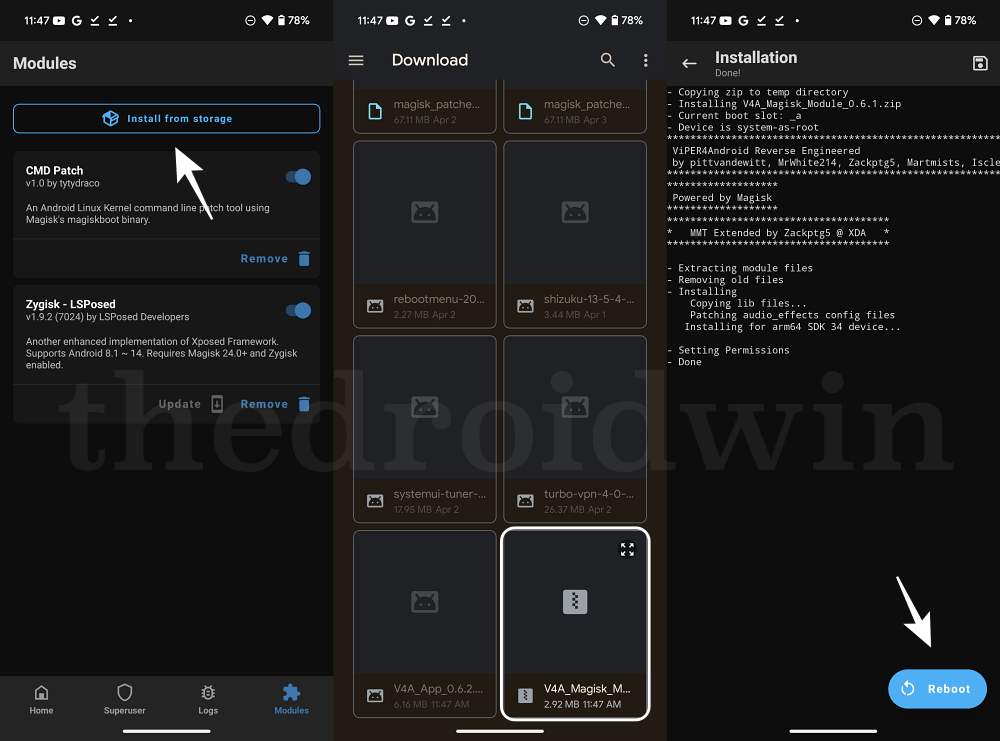
- Now select the Viper4Android mod and hit OK in the confirmation prompt.
- The module will now be flashed. Once done, hit Reboot.
- Once the device boots up, install the Viper4Android-RE app.
- Now launch it and tweak it as per your requirements.

METHOD 2
- Download the Audio Compatibility Patch and Audio Modification Library from below:
ACP: https://john-fawkes.com/Downloads/acp.zip
AML: https://zackptg5.com/downloads/Audio-Modification-Library_v4.1.zip
- Then launch Magisk, go to the Modules section, and tap on Install from Storage.
- Now select the AML mod and it will be flashed. Once done, do not reboot your device.
- Rather, select the ACP Mod and flash it. It will bring up a setup wizard [respond via Volume Up/Down keys]
Patch audio_policy ?         | Yes
- Select Patch Method :      | Vol Up - Patch (new logic)
Remove notification_helper ? | Yes
- Select Fix Method :        | Vol Up : Remove notification_helper effect
Patch USB policy for dacs ?  | No
Use Lib workaround ?         | No
- Once done, reboot your device to stock recovery and wipe Dalvik Cache [recommended]. Then reboot to System.
- Now download the Viper4Android from below and flash it via Magisk. Once done, hit Reboot.
Viper4Android
- Once your device boots up, launch Viper4Android. It will ask to install drivers, hit OK.
- Then tap Grant in the Magisk request. Your device will now automatically restart.
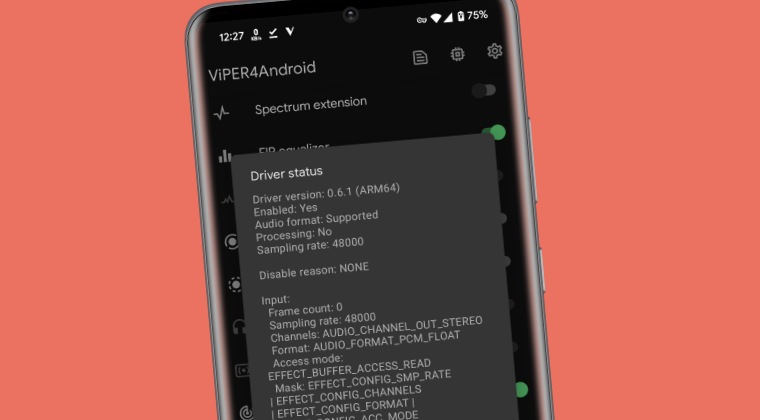
- Once it reboots, go to Advanced Settings and set Legacy Mode to Always On.
- Viper4Android is now installed on your Android device [if you face any issues, just delete Dalvik Cache from stock recovery].
METHOD 3
- Download and install the Viper4Android APK onto your device.
- Once done, reboot your device. Then download the Viper Patch.
- Now launch Magisk, go to the Modules section, and tap on Install from Storage.
- Then select the Viper Patch and it will be flashed. Once done, do not reboot your device.
- Rather open Viper4Android and let it install the drivers. Once done, reboot your device
- That’s it. Viper4Android is now installed on your Android device.
METHOD 4
- Download the required files from below and send them to your device
Ainur Narsil
Audio Modification Library
- Now launch Magisk, go to the Modules section, and tap on Install from Storage.
- Then select the Ainur Nasil module to flash it.
- Similarly, flash the Audio Modification Library.
- After that, install the Viper4Android APK. Once done, reboot your device.
- Now launch Viper4Android and install the required drivers. That’s it.
- If you are facing any issues, then disable Audio Modification Library via Magisk.
- Now restart your device, re-enable the mod, and then again restart your device.
METHOD 5
- Download the Viper4Android and Audio Modification Library from below.
Viper4Android
Audio Modification Library
- Then launch Magisk, go to the Modules section, and tap on Install from Storage
- Now select Viper4Android and it will be flashed. Once done, do not reboot your device.
- Rather, flash the Audio Modification Library. Again, do not reboot your device.
- Now launch Viper4Android. it will ask to install Drivers and hit OK.
- Then tap Grant in the Magisk pop-up. Your device will now automatically restart
- Launch Viper4Android, go to Advanced Settings, and set Legacy Mode to Always On. The app will now crash.
- Once that happens, launch Magisk and uninstall Audio Modification Library. Then restart your device.
- Then launch Magisk, go to the Modules section, and tap on Install from Storage.
- Now select Audio Modification Library and it will be flashed. Once done, hit Reboot.
- Your Android device will now restart and the Viper4Android should be up and running.
That’s it. These were the steps to install Viper4Android on any device running the latest Android 14. While there exist quite a few audio mods and while each of them works quite decently in their own rights, none could come close to the end result that Viper has to offer. So that is the reason why we [and many others] are usually inclined towards this app. With that said, if you prefer any other audio-related mod, then do let us know the same in the comments section below.