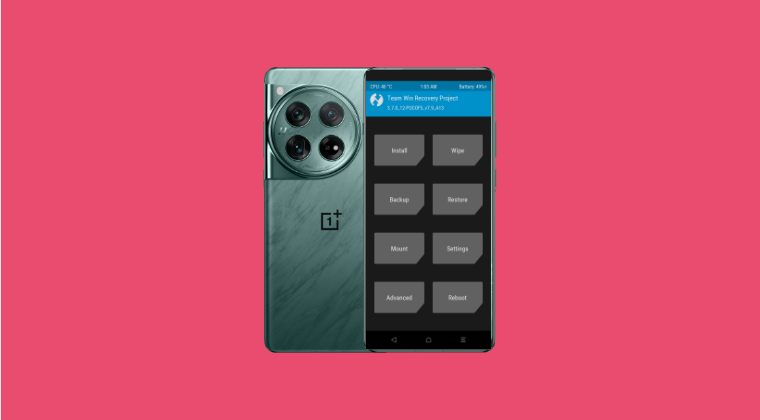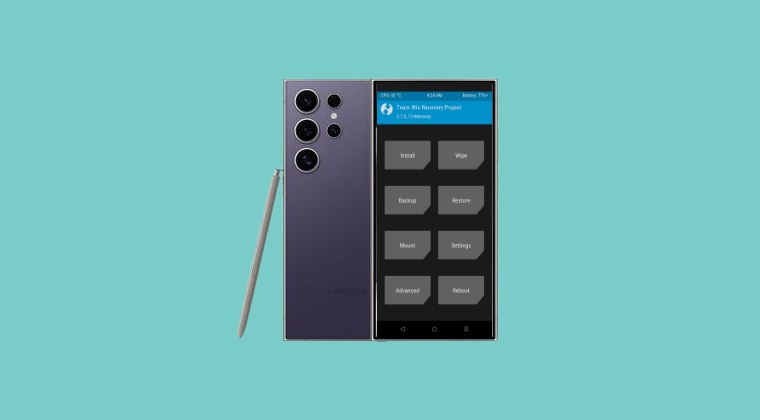

This guide will list various methods to install the TWRP Recovery on any Android device. If a tech enthusiast is planning to step into custom development, then there are quite a few tools that you should have in your arsenal. However, it goes without saying that a custom recovery is the most powerful one among all of them. And the reason for the same is hardly a secret either.
From flashing files to taking a backup or wiping device partitions, it can carry out all these tasks with ease. However, installing a recovery is becoming more complicated and challenging with each passing day. Due to changes in partition styles, removal of recovery partition, the introduction of Ramdisk, or using a temporary booting technique, nearly every device follows a different flashing method.
This proves to be quite a challenging task, not just for the newcomers but even for the seasonal veterans in some cases. If you are also sailing in the boat of uncertainty, then fret not as this guide will make you aware of various methods through which you could install a TWRP Recovery on your Android device. So without further ado, let’s get started.
How to Install TWRP Recovery on Android
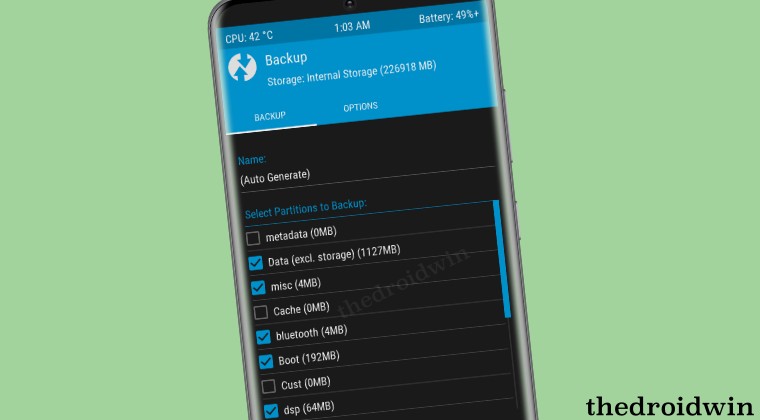
Before starting, please take a backup of all the data on your device, just to be on the safer side. Moreover, the below steps are not applicable for Samsung devices as they use the Odin Tool to get this job done. So if you own a Samsung device, then do check out our guide. Thedroidwin will not be held responsible if something happens to your device and data after performing the below steps.
The Prerequisites
- First off, download and extract Android SDK Platform Tools on your PC.
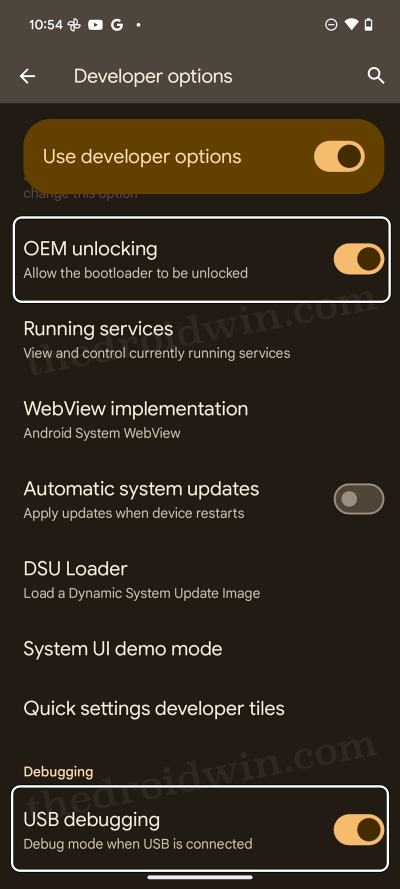
- Next up, enable USB Debugging as well as OEM Unlocking on your device.
- Then unlock the bootloader via our detailed guide or the below command:
fastboot flashing unlock
- Now download the TWRP Recovery for your device. You may get it from the official site or a third-party trusted site like XDA.
- Once downloaded, rename it to twrp.img [and twrp.zip, if there’s a ZIP] and then transfer the file to the platform-tools folder.
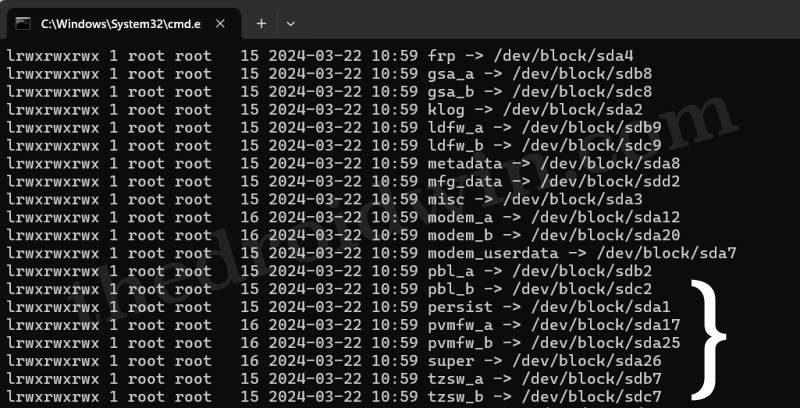
- Now execute the below commands to check if your device has a recovery partition or not:
adb shell
cd /dev/block/platform
ls -la /dev/block/bootdevice/by-name
- Check if the output has recovery or recovery_a or recovery_b keywords.
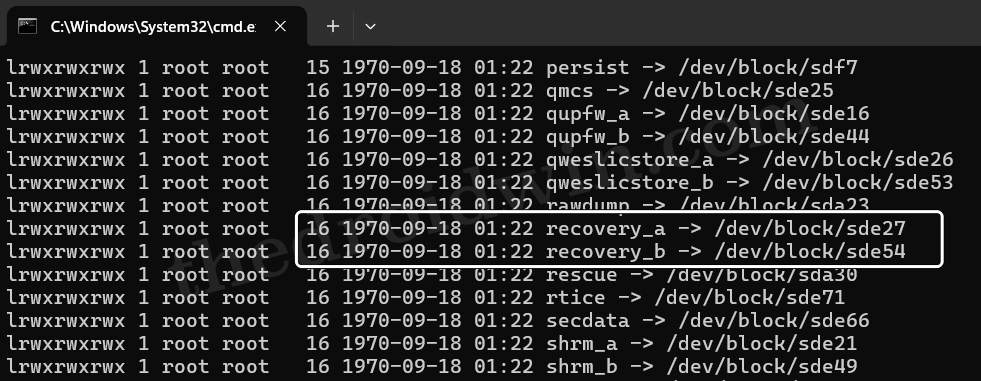
Recovery Partition - If it does, then your device has a recovery partition, otherwise, it doesn’t.
No Recovery Partition - Now open the Command Prompt window inside the platform tools folder.
- Then type in the below command to boot your device to the Fastboot Mode.
adb reboot bootloader
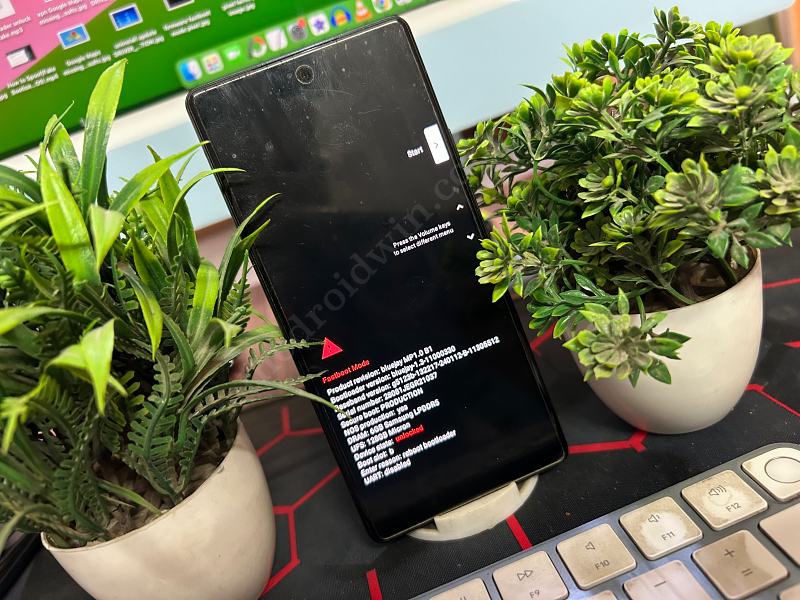
- Now type in the below command to verify the Fastboot connection.
fastboot devices
- If you don’t get any ID, then install the Fastboot Drivers on your PC.
METHOD 1: Devices with Recovery Partition
- If your device has a recovery partition, then directly flash to that partition via the below command:
fastboot flash recovery twrp.img
- Then use the below command to boot your device to the newly flashed TWRP:
fastboot reboot recovery
METHOD 2: Devices without Recovery Partition
On the other hand, if your device does not have a recovery partition, then use the below command to temporarily boot your device to TWRP via the below command:
fastboot boot twrp.img

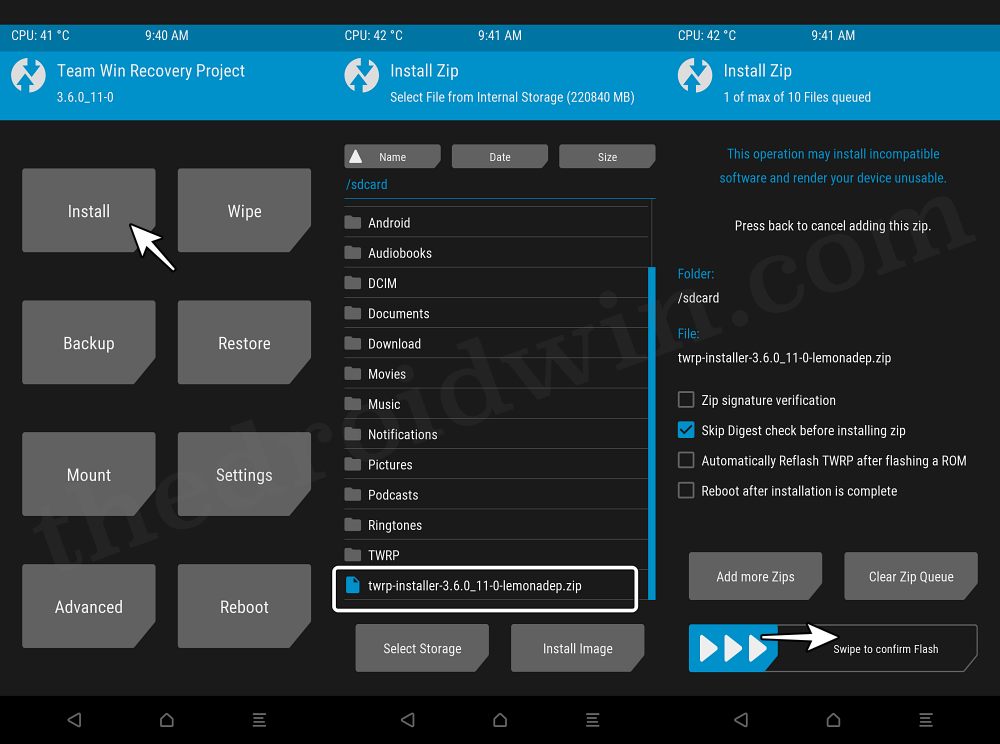
Method 2A: Via TWRP ZIP
Now if your device has a TWRP ZIP file, then transfer the file to your device, go to TWRP > Install > select the ZIP > flash it.
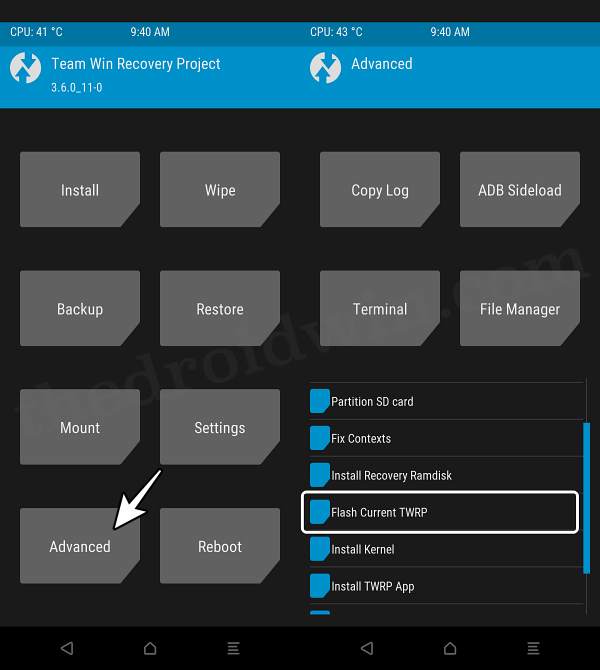
Method 2B: Via Flash Current TWRP
If there’s no ZIP, then go to Advanced > Flash Current TWRP and check out the results.
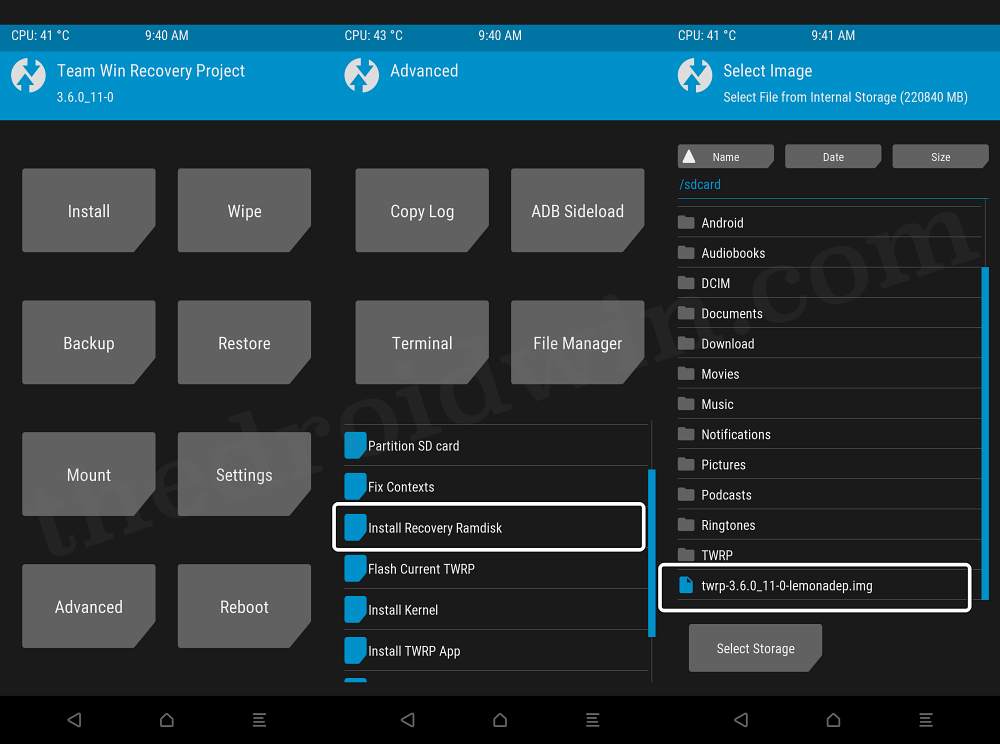
Method 2C: Via Install Recovery Ramdisk
If the Flash Current TWRP method doesn’t spell out success, then you should try taking the help of Ramdisk. For that, transfer the TWRP IMG file to your device. Then go to Advanced > Install Recovery Ramdisk > select the twrp.img and flash it.
These were the various methods through which you could install the TWRP Recovery on your Android device. Still, have any doubts? The comments section is all yours, make your voices heard there and we’ll chalk out the best fix for you.