This guide will outline the detailed steps to install the GSI ROM on any Android device. When it comes to custom development, then flashing a custom ROM has forever been the go-to choice for the tech enthusiast. This is because even though every OEM has its own OS skin, however, they may not be able to checkmark the requirements of the end users.
For instance, many are of the opinion that the likes of Xiaomi’s MIUI and OnePlus OxygenOS [or rather ColorOS!] have become way too bloated with tons of unnecessary apps. On the other hand, the likes of Pixel offer a clean stock OS experience with just the barebone important features, which again tend to fall short of some user’s expectations. So to rectify all these issues, your best bet is to flash a customized firmware. However, not every device enjoys the same degree of support from the developers.
While some are blessed with tons of ROMs, there are a few that are left behind, whether due to the OEM not releasing the source code, the device not being popular, or simply due to the developer’s non-interest in that device. So what else could be done? Well, this is where the role of a Generic System Image comes into the picture. But what exactly is a GSI ROM and how could you download and install it onto your Android device? Let’s find out.
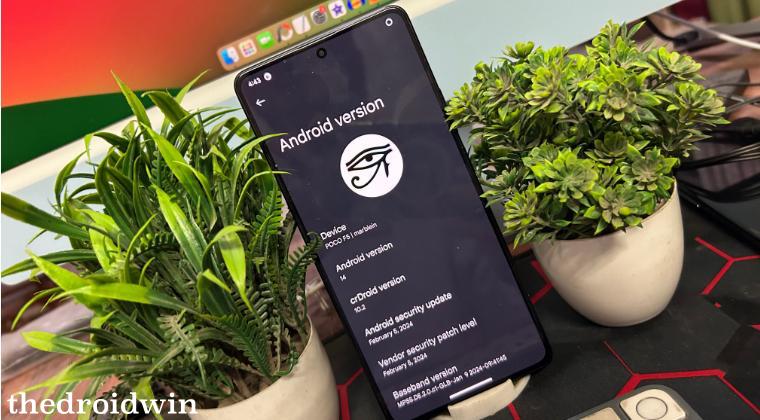
What is Generic System Image GSI ROM?
As is evident from its name, a Generic System Image is “generic” in nature and is supported across all Android devices that are Project Treble compatible, i.e. devices launched with Android 8.0+ out of the box. The device’s manufacturer, the OS skin, and the current Android version that it is running do not come into play, if it is Project Treble compatible, then it should support your device. With that said, there are a few important things to keep in mind before you get your hands on these ROMs, so let’s check them out.
Which GSI ROM Should I Download?
Even though the GSIs are supported across nearly all Android devices, however, you have to keep one thing in mind- there are numerous variants of the GSI ROM and you have to make sure that you download the one that corresponds to your device’s generic specifications. For that, either refer to the below short instructions or the detailed steps given in the following guide: Which GSI ROM file should you download for your Android Device.
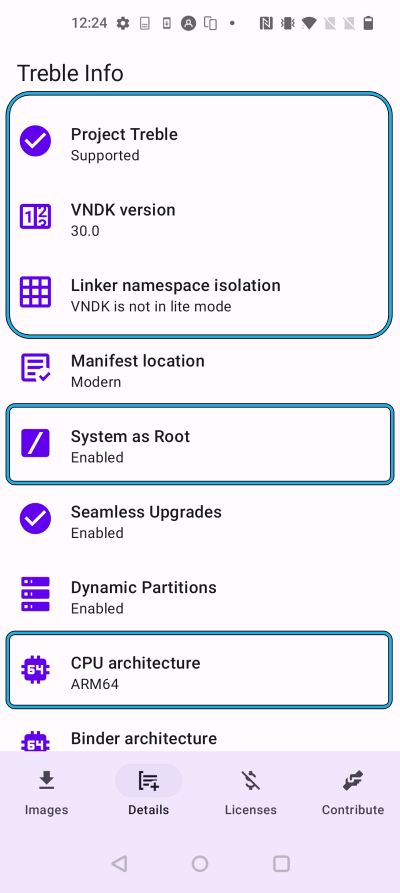
- Download and install the Treble Info app from the Play Store.
- Then launch it, go to the Details tab, and check out the information next to:
Project Treble: Supported or Unsupported.
System as Root: Enabled or Disabled.
CPU Architecture: ARM64 or ARM64 - X86.
VNDKLite: Either in Lite Mode or Not in Lite Mode.
Keeping all this information into perspective, here’s what type of GSI ROM should you download:
- If Project Treble is Unsupported, then, unfortunately, you will not be able to install any GSI ROM on your device.
- If System as Root is Enabled, then you’ll have to download b only GSI ROM. If it is Disabled, then download ab GSI.
- As far as CPU Architecture is concerned, the ROM’s name should already have it mentioned, so download the one that corresponds to your device’s architecture. Most of today’s devices are ARM64.
- If VNDK is not in LiteMode, then you’ll have to download a non-VNDK Lite ROM [If there’s a ROM that doesn’t have any mention of VNDK in its name, then it would be non-VNDK Lite ROM]. However, if it is VNDKLite Mode, then download the VNDK Lite ROM.
From Where to Download GSI ROM
Well, there’s no single source from where you could get hold of these GSI ROMs, though the below developers are some of the most noteworthy players in this domain. So head over to the below links and download the GSI ROM according to your requirements.
Andy Yan
Nippon
ExpressLuke
ats17
How to Install GSI ROM on any Android
The below process will wipe off all the data from your device, so take a complete device backup. TheDroidwin will not be held responsible if something happens to your device or data after performing the below steps.
- To begin with, download and extract Android SDK Platform Tools on your PC.

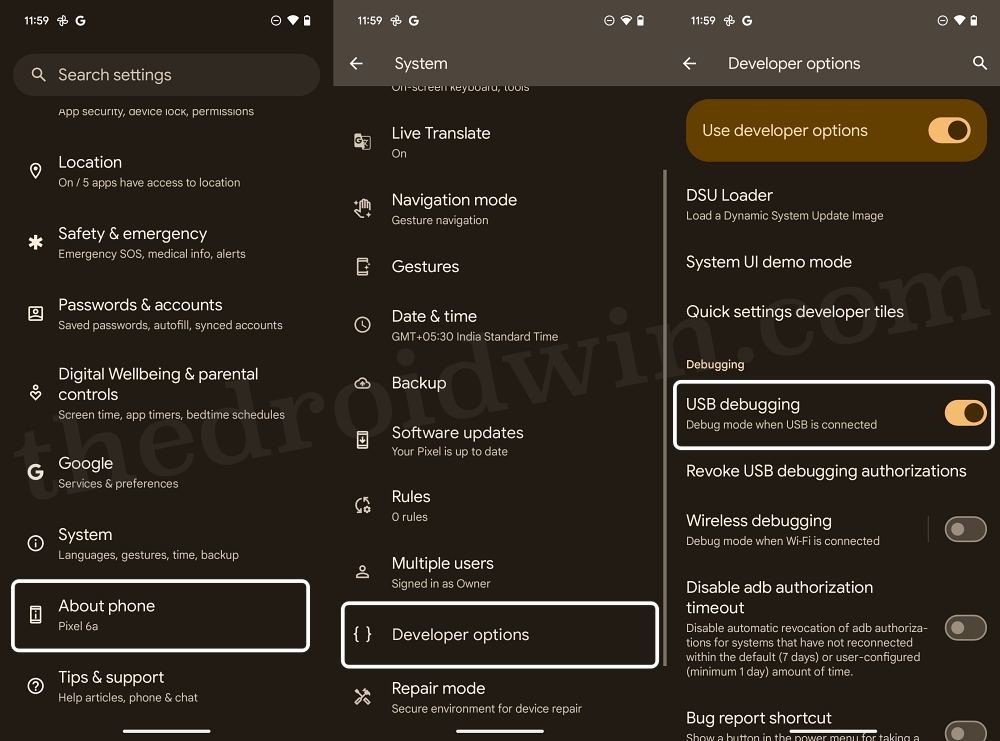
- Then enable USB Debugging and connect your device to your PC via USB cable.
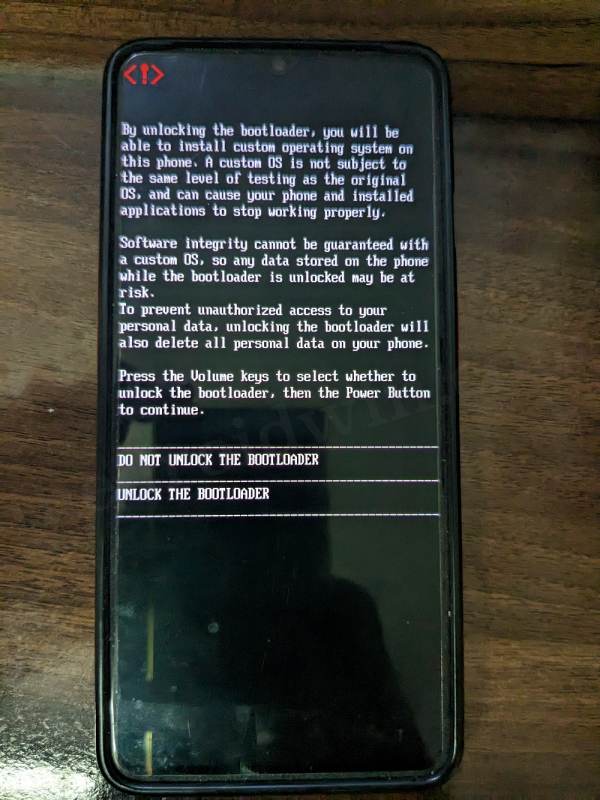
- Now unlock the bootloader on your device.
- Then extract the downloaded GSI ROM inside the platform-tools folder.
- For extraction, use the 7ZIP software. Once extracted, rename the file to gsi.img.
- Then download the firmware that is currently installed on your device.
- Now extract it, get the vbmeta.img, and transfer it to the platform-tools folder.
- Then open Command Prompt inside the platform-tools folder and type in:
adb reboot bootloader
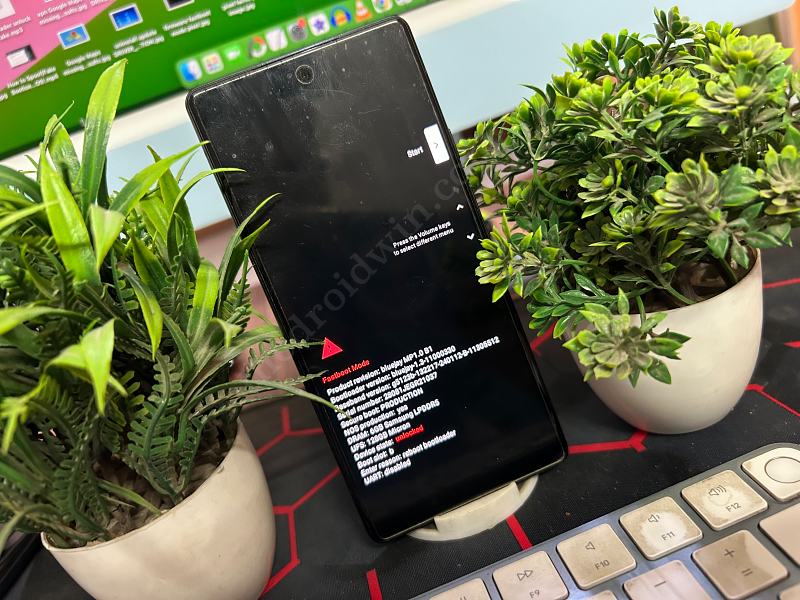
- Your device will boot to Fastboot Mode. Now type the below command:
fastboot devices
- If you are not getting any serial ID, then please install Fastboot Drivers on your PC.
- Now type in the below command to disable verity/verification by flashing vbmeta:
fastboot --disable-verification flash vbmeta vbmeta.img
- Then use the below command to boot your device to FastbootD Mode:
fastboot reboot fastboot
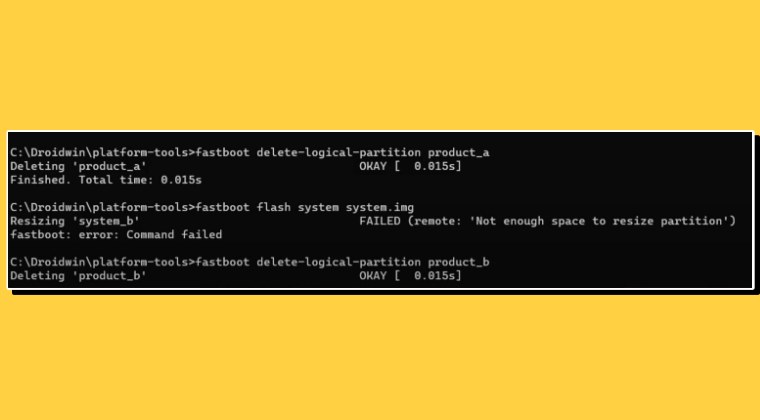
- Now delete the logical partition to free up some space on your device:
fastboot delete-logical-partition product_a
- Then type in the below command to flash the GSI ROM:
fastboot flash system gsi.img
- Now type in the below command to format the data:
fastboot -w
- Finally, execute the below command to boot your device to the newly flashed OS:
fastboot reboot
That’s it. These were the steps to install GSI ROM on your Android device. Still, have any doubts? The comments section is all yours, make your voices heard there and we’ll chalk out the best fix for you.