In this guide, we will make you aware of Google Camera GCam and how can you install it onto your smartphones. Smartphones are generally categorized under three domains- budgets like the Pocos and the Nords series, mid-segment like the OnePlus R and Pixel A series, and high-end like the Folables/Flipables and the Galaxy S series.
Each of them beholds its own set of features and specs, with the obvious fact that there’s a direct proportional increment in the feature set with a rise in price. And the same stands true for the camera as well. The more bucks you shell out of your pockets, the better quality camera you get, with the likes of Pixel and Galaxy currently reigning supreme in this domain.
However, what might not be obvious to many is the fact that you can enjoy a much better camera quality on your budget or mid-segment Android device simply by installing a Google Camera/GCam port. But what exactly is a GCam and how to get hold of the same? This guide will answer all your queries as well as its features and the XML config installation steps. So without any further ado, let’s get started.
What is Google Camera/GCam

Google Camera, also known as GCam, is a port of the Google Camera app taken directly from a Pixel device. These APKs are generic in nature and can be installed across near about any Android device. With that said, most of them have their XML file as well.
These are the configuration files that have a few specific presets and camera settings that you can directly import onto your device. These XML files are specifically aimed at a particular device or chipset, thereby giving you much better usability and stability.
What are the Features of GCam?
Google Camera beholds a slew of intriguing and nifty features up its sleeves, with numerous ones being added over the course of new iterations. With that said, the below-listed ones are some of the most noteworthy and useful ones.
- HDR+: Not just the traditional HDR mode, but its much more. It employs image stacking to control the exposure limit. Plus it is also used to preserve image details, reduce noise, and increase sharpness, i.e. a complete all-in-one package. Read More
- HDR+ Enhanced Mode: In Nexus 6P and 5Z we had the HDR+ mode. Now that has been replaced with HDR+ Enhanced Mode. Let’s understand it in simpler terms: In HDR+ what used to happen was when you clicked the shutter button, a small circle will keep moving around while it captured images you needed for the burst.
But with the Enhanced Mode, that has completely changed. Now, the moment you press the shutter button, it is not capturing the images, the images have already been captured. When you press the shutter button, it just marks the time when it was pressed- the pictures have already been captured way before. Then, it combines both the images (captured before and the current image) to give you a complete image. - Portrait Mode: This mode is used to separate the object in focus from the background image, making the background appear to blur.

- Motion Photos: It is used to provide short clips of moments, before and after you click a picture. “Much more than a GIF, less than a video”. Read More.
- Top Shot: As the name suggests, Google Camera will only click a picture when it’s a ‘top shot’. For example, if someone blinked while the picture is being taken, then it would recommend you to retake that photo. Note: Earlier, this feature was known as Smartburst.
- Photobooth: Automatically clicks the picture when the Google Camera detects a smile or even a silly face!
- Super Res Zoom: Available in very few GCams, it enhances the image quality of the zoomed picture. It does so by shifting the camera module using Optical Image Stabilization. Read More.
- Night Sight: Considerably improves the images taken under extremely low light conditions. Although each device has its own Night Mode, it manages to outbeat them all.
- Video Stabilization: As is evident by its name, it tends to provide an impressive level of video stabilization when you’re recording videos while on a moving subject, such as any means of transport. If your device has an OIS and or EIS, then this feature will come into action with even better mileage.
Download GCam for Android
Celsoazevedo is the best and most trusted site when it comes to downloading Google Camera Ports for your Android device. Herein you’ll find GCam ports for numerous devices and from various developers, with the likes of Arnova8G2 BigKaka BSG burial cstark fu24 Greatness, and Urnyx05 being some of the most popular modders.
Since Google Camera is a closed-source app, it is nearly an impossible task to add new features to the camera, though the developers try their best to iron out underlying bugs and enhance the performance to the maximum possible level. Therefore, it is highly recommended that you try out various builds of GCam as well as from numerous developers until you find the one that works the best for your device.
Moreover, if a GCam has an XML file, make sure to grab it as well. With that said, download the Google Camera for your device from below and then refer to the installation steps that follow.
DOWNLOAD: GOOGLE CAMERA PORTS
At the time of writing, the. version 12 of GCam is the latest one and BigKaka, BSG, and Shamim are the devs with the most stable releases. So if you don’t wish to go through the ocean of GCams from the aforementioned link, then you may directly check out the GCam for these three developers:
How to Install GCam/Google Camera on Android
While some GCam have built-in configuration settings, the majority of the others have a standalone configuration XML file which needs to be imported manually. So if that is the case with your GCam port as well, then here’s how you can install it onto your Android device right away:
- To begin with, download the desired version of GCam.
- Likewise, download its config XML file onto your device [optional].

- Then install the camera APK file [enable Installation from Unknown sources, if required].
- If you have downloaded the XML file as well, then transfer it to /Download/AGC.9.2/configs/ folder [where 9.2 is the version number, replace it with yours].
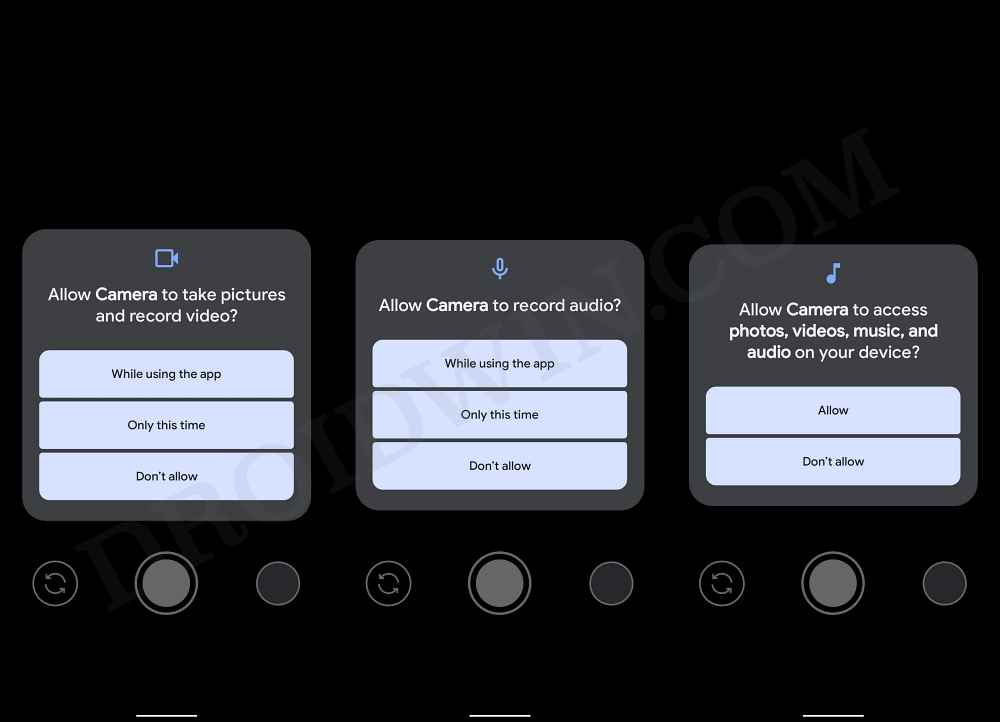
- Once installed, launch GCam and grant it the necessary permissions.
- Now double tap on the black region next to the capture button.
- After that, navigate to the downloaded XML file and select it.

- The camera will now restart with the best settings imported from the XML file.
Do keep in mind that you might not get the best result at the first attempt. Usually, you’ll have to try numerous versions of the GCam and its XML file until you find out the one that works the best for your device. So on that note, we round off this guide.
We will be continuously updating this post with new ports as and when they are live. In the meantime, if you have any queries concerning the aforementioned steps, do let us know in the comments. We will get back to you with a solution at the earliest.
- SSRM Warning Fails to Parse Policy XML [Samsung Fix]
- How to Install LineageOS using Heimdall on Samsung
- Error Verifying Vbmeta Image on Samsung: How to Fix
- How to Downgrade Samsung One UI [Bootloader Version Rule]